
Tutorials
Audience crafter
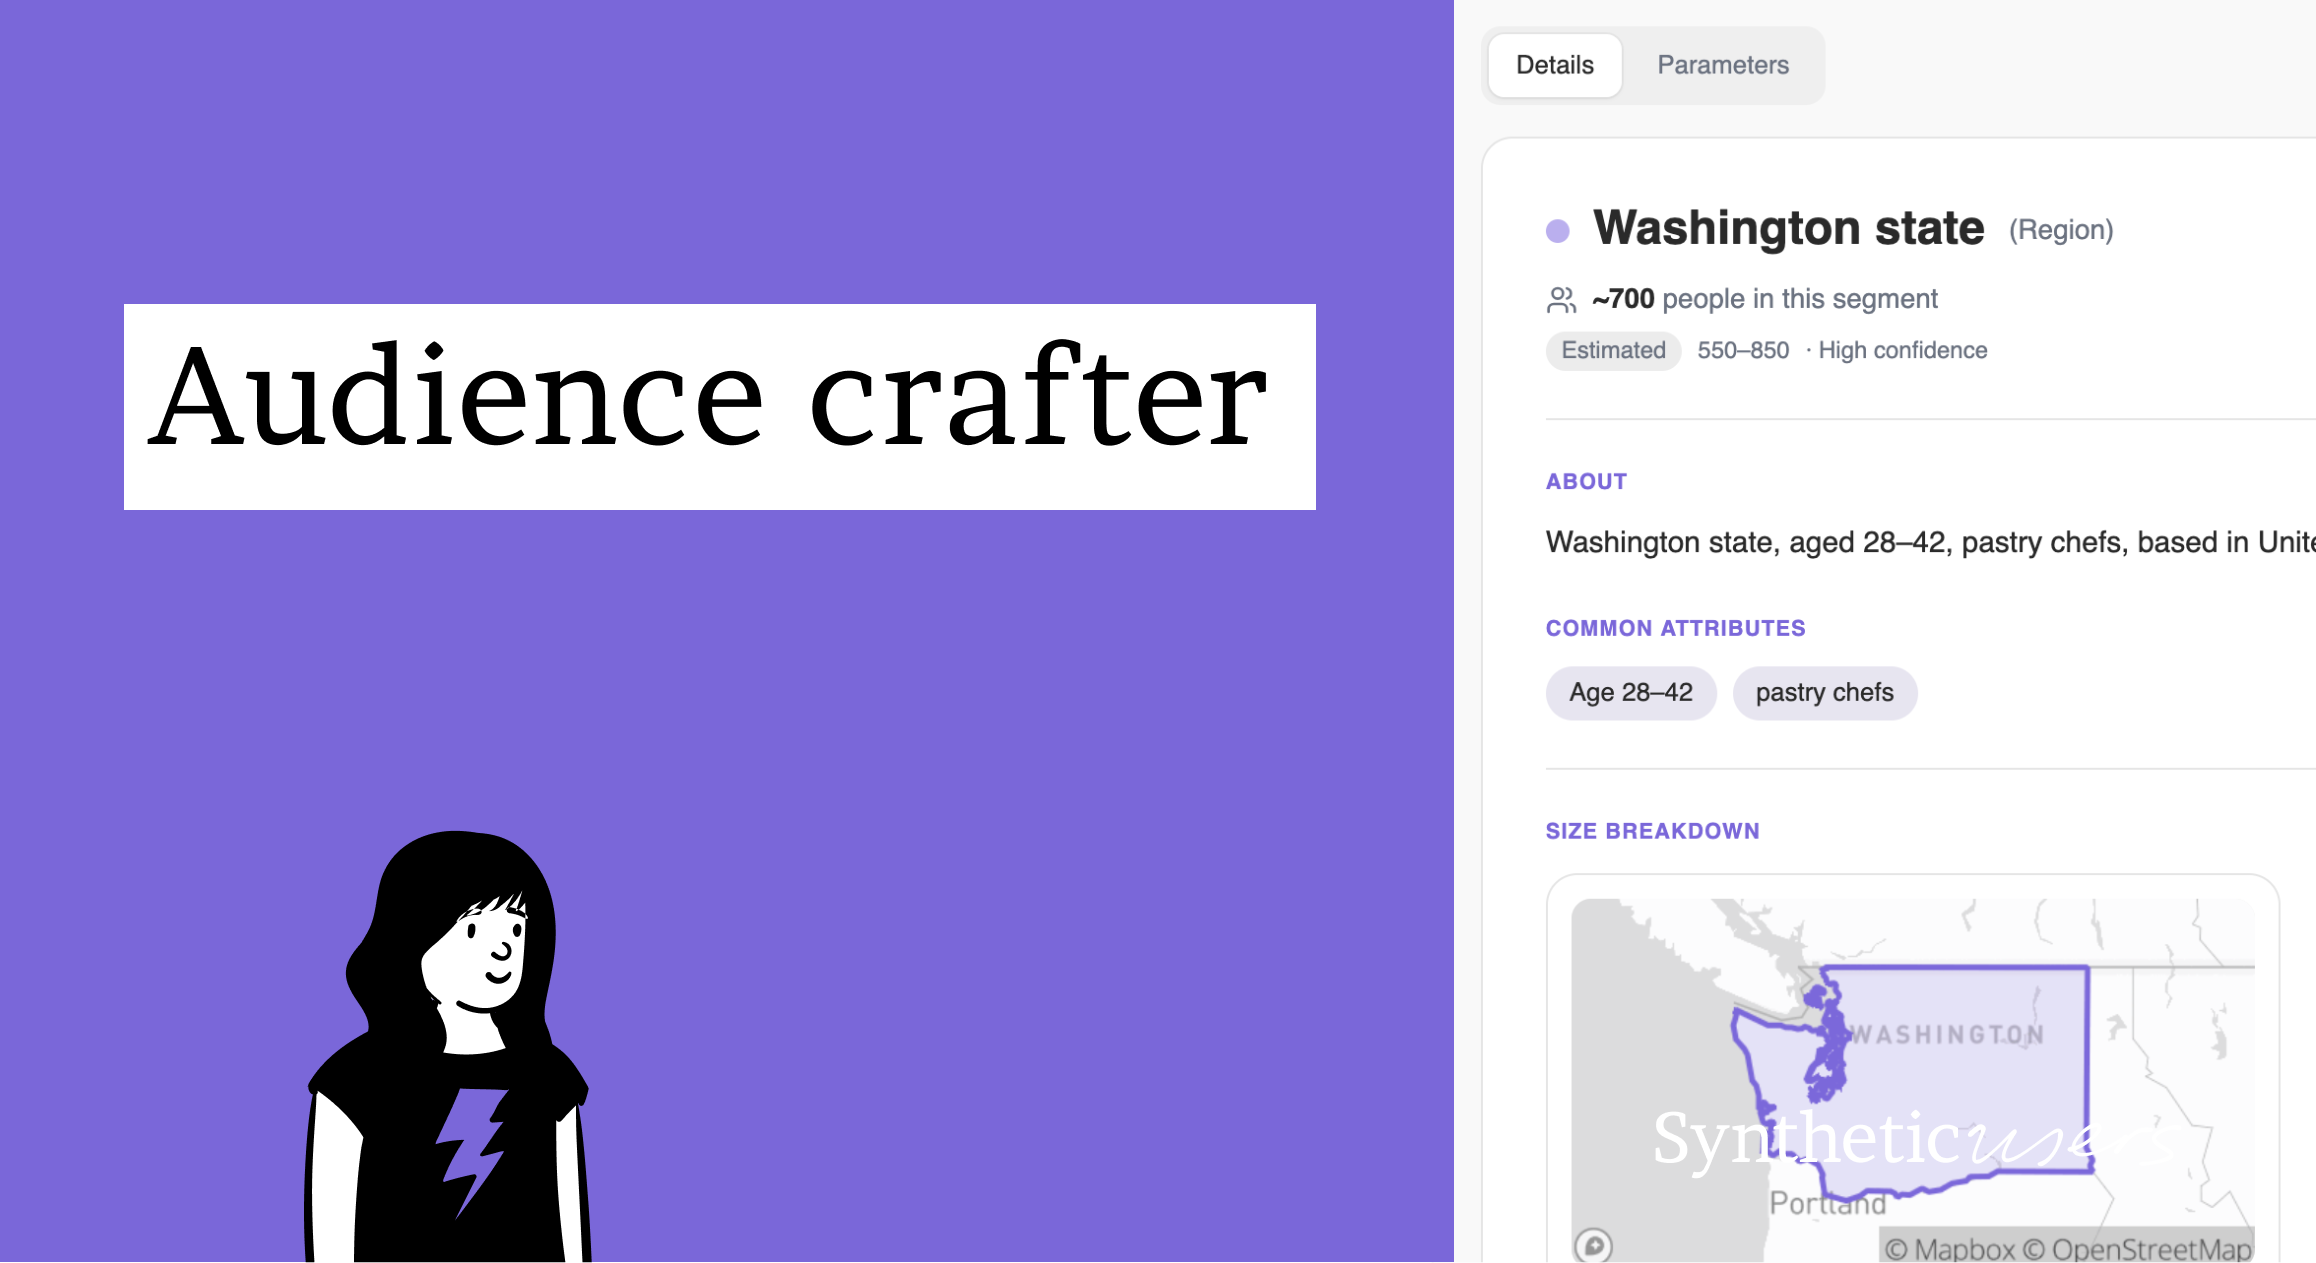
You now have more control over your Synthetic Users' parameters. You can also save and reuse audiences in a more granular way as well as have visibility over population sizes.
The Audience Crafter lets you define exactly who you want to interview — in plain conversation — and turn that definition into a reusable, segmented audience. Here's how it works, step by step.
1. Open the Audience Crafter
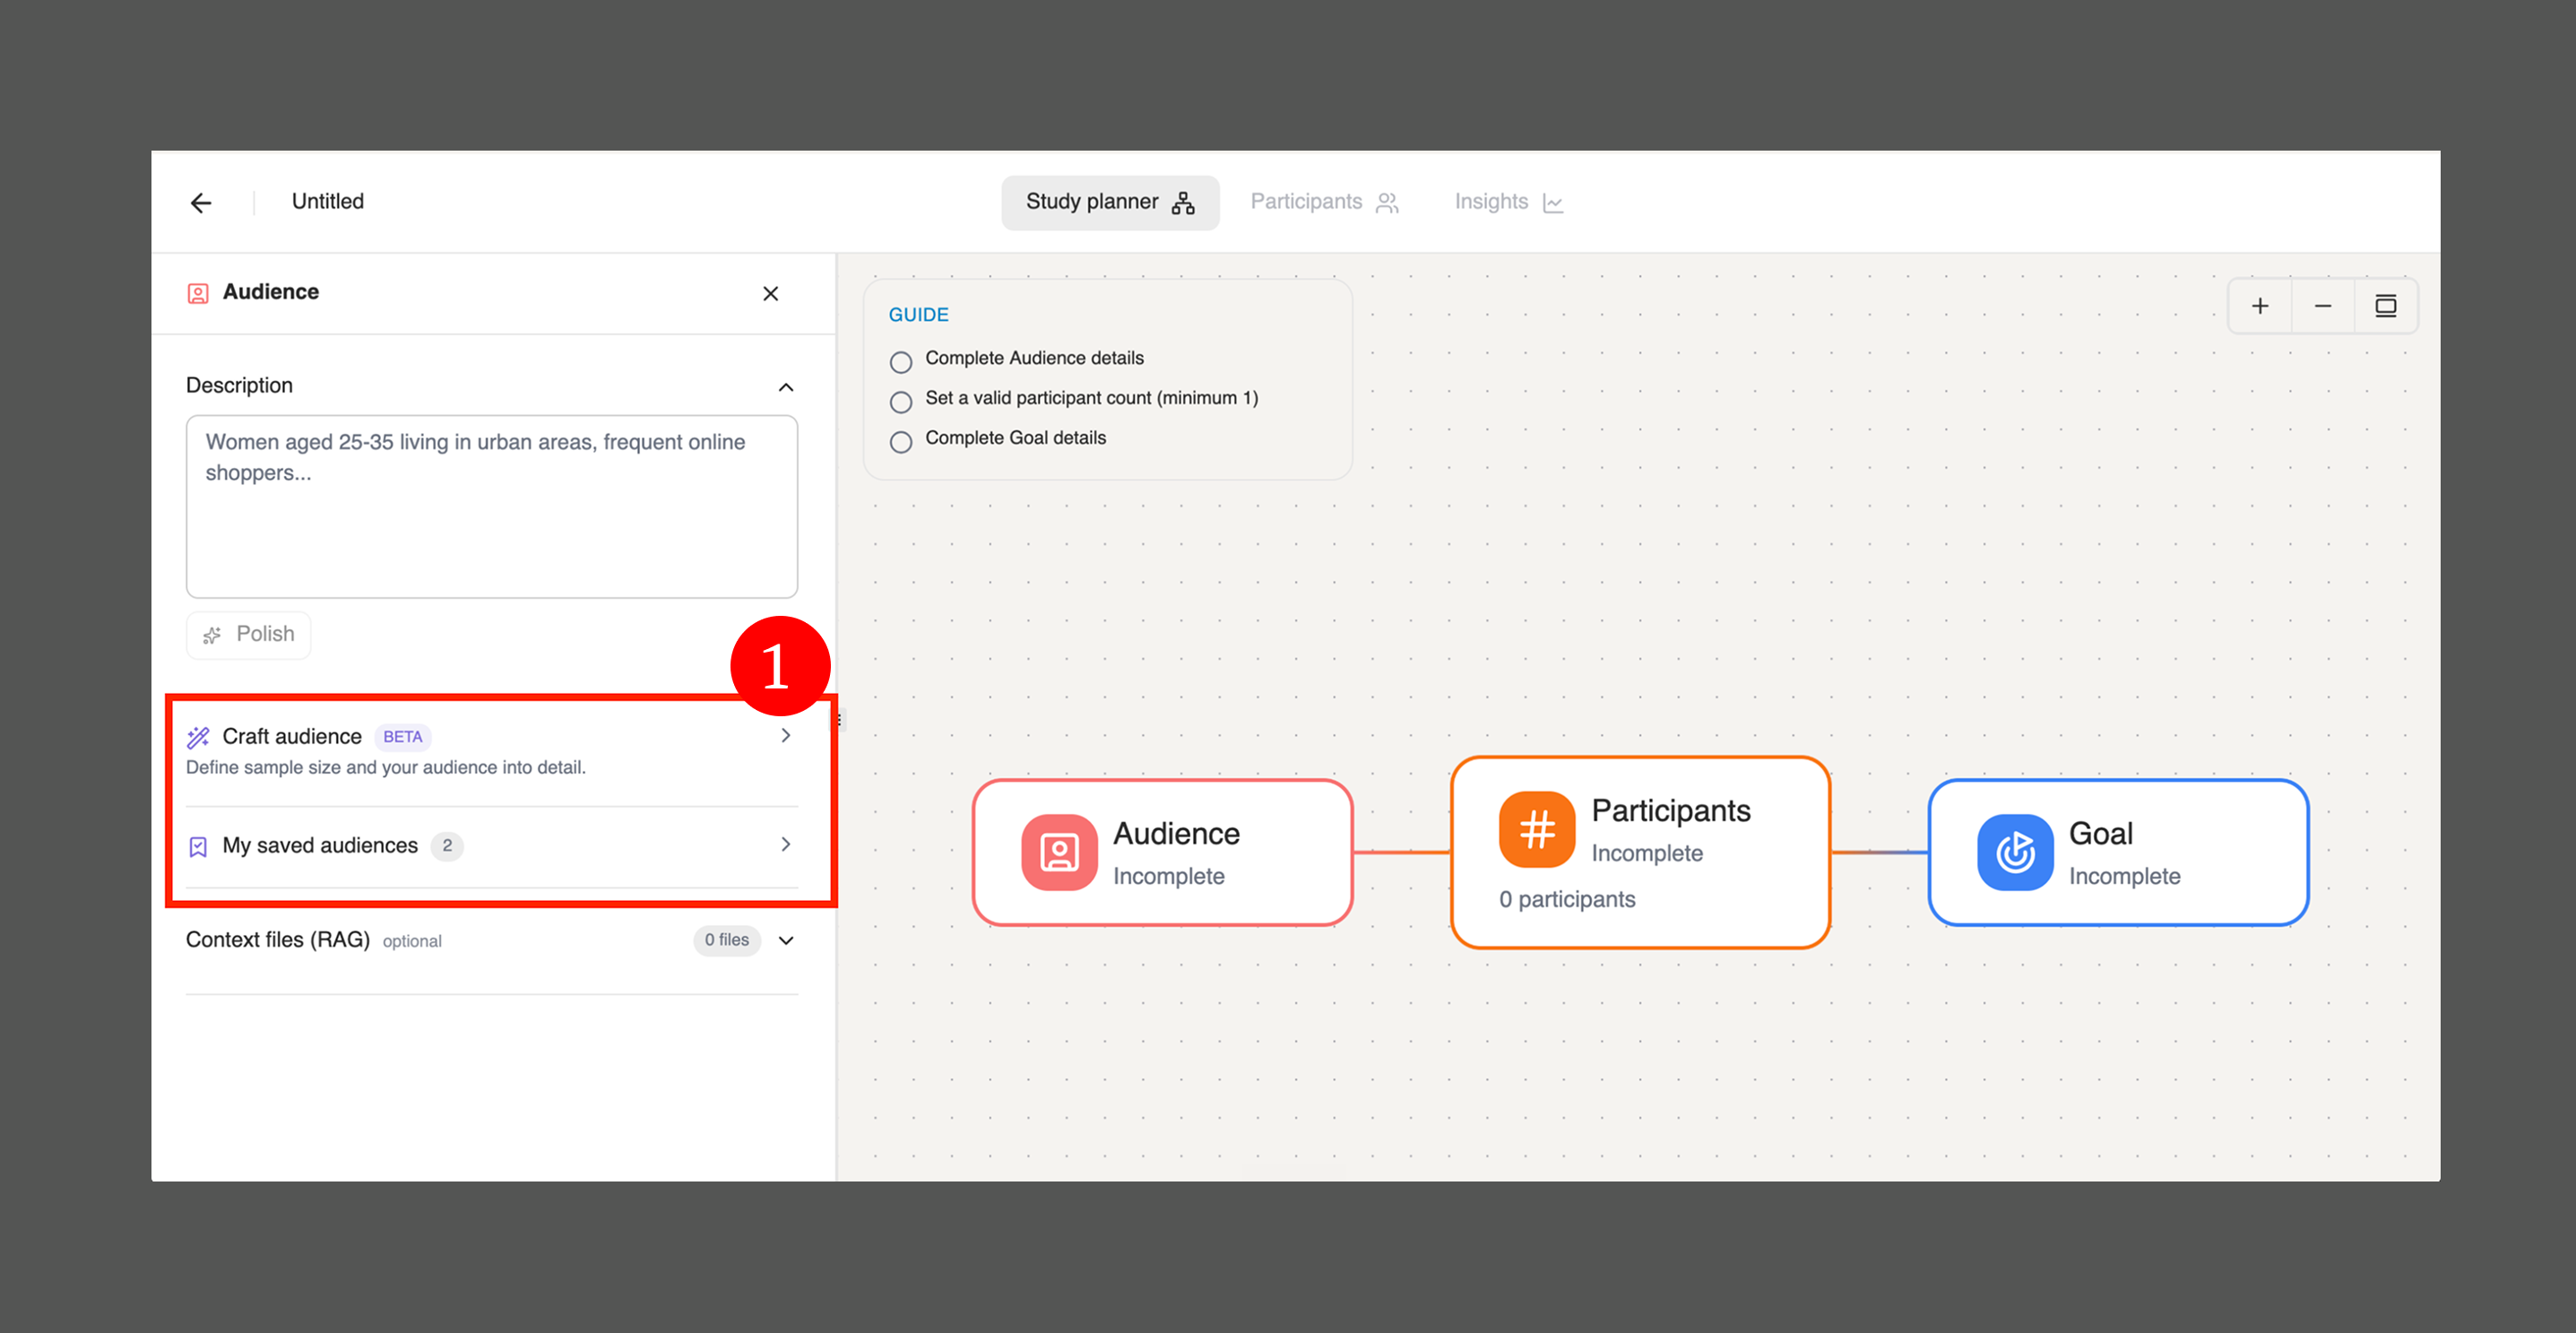
Whenever you edit an Audience node in the study planner — for a new study or a template — you'll find Craft audience, along with your saved audiences (1).
2. Describe your audience
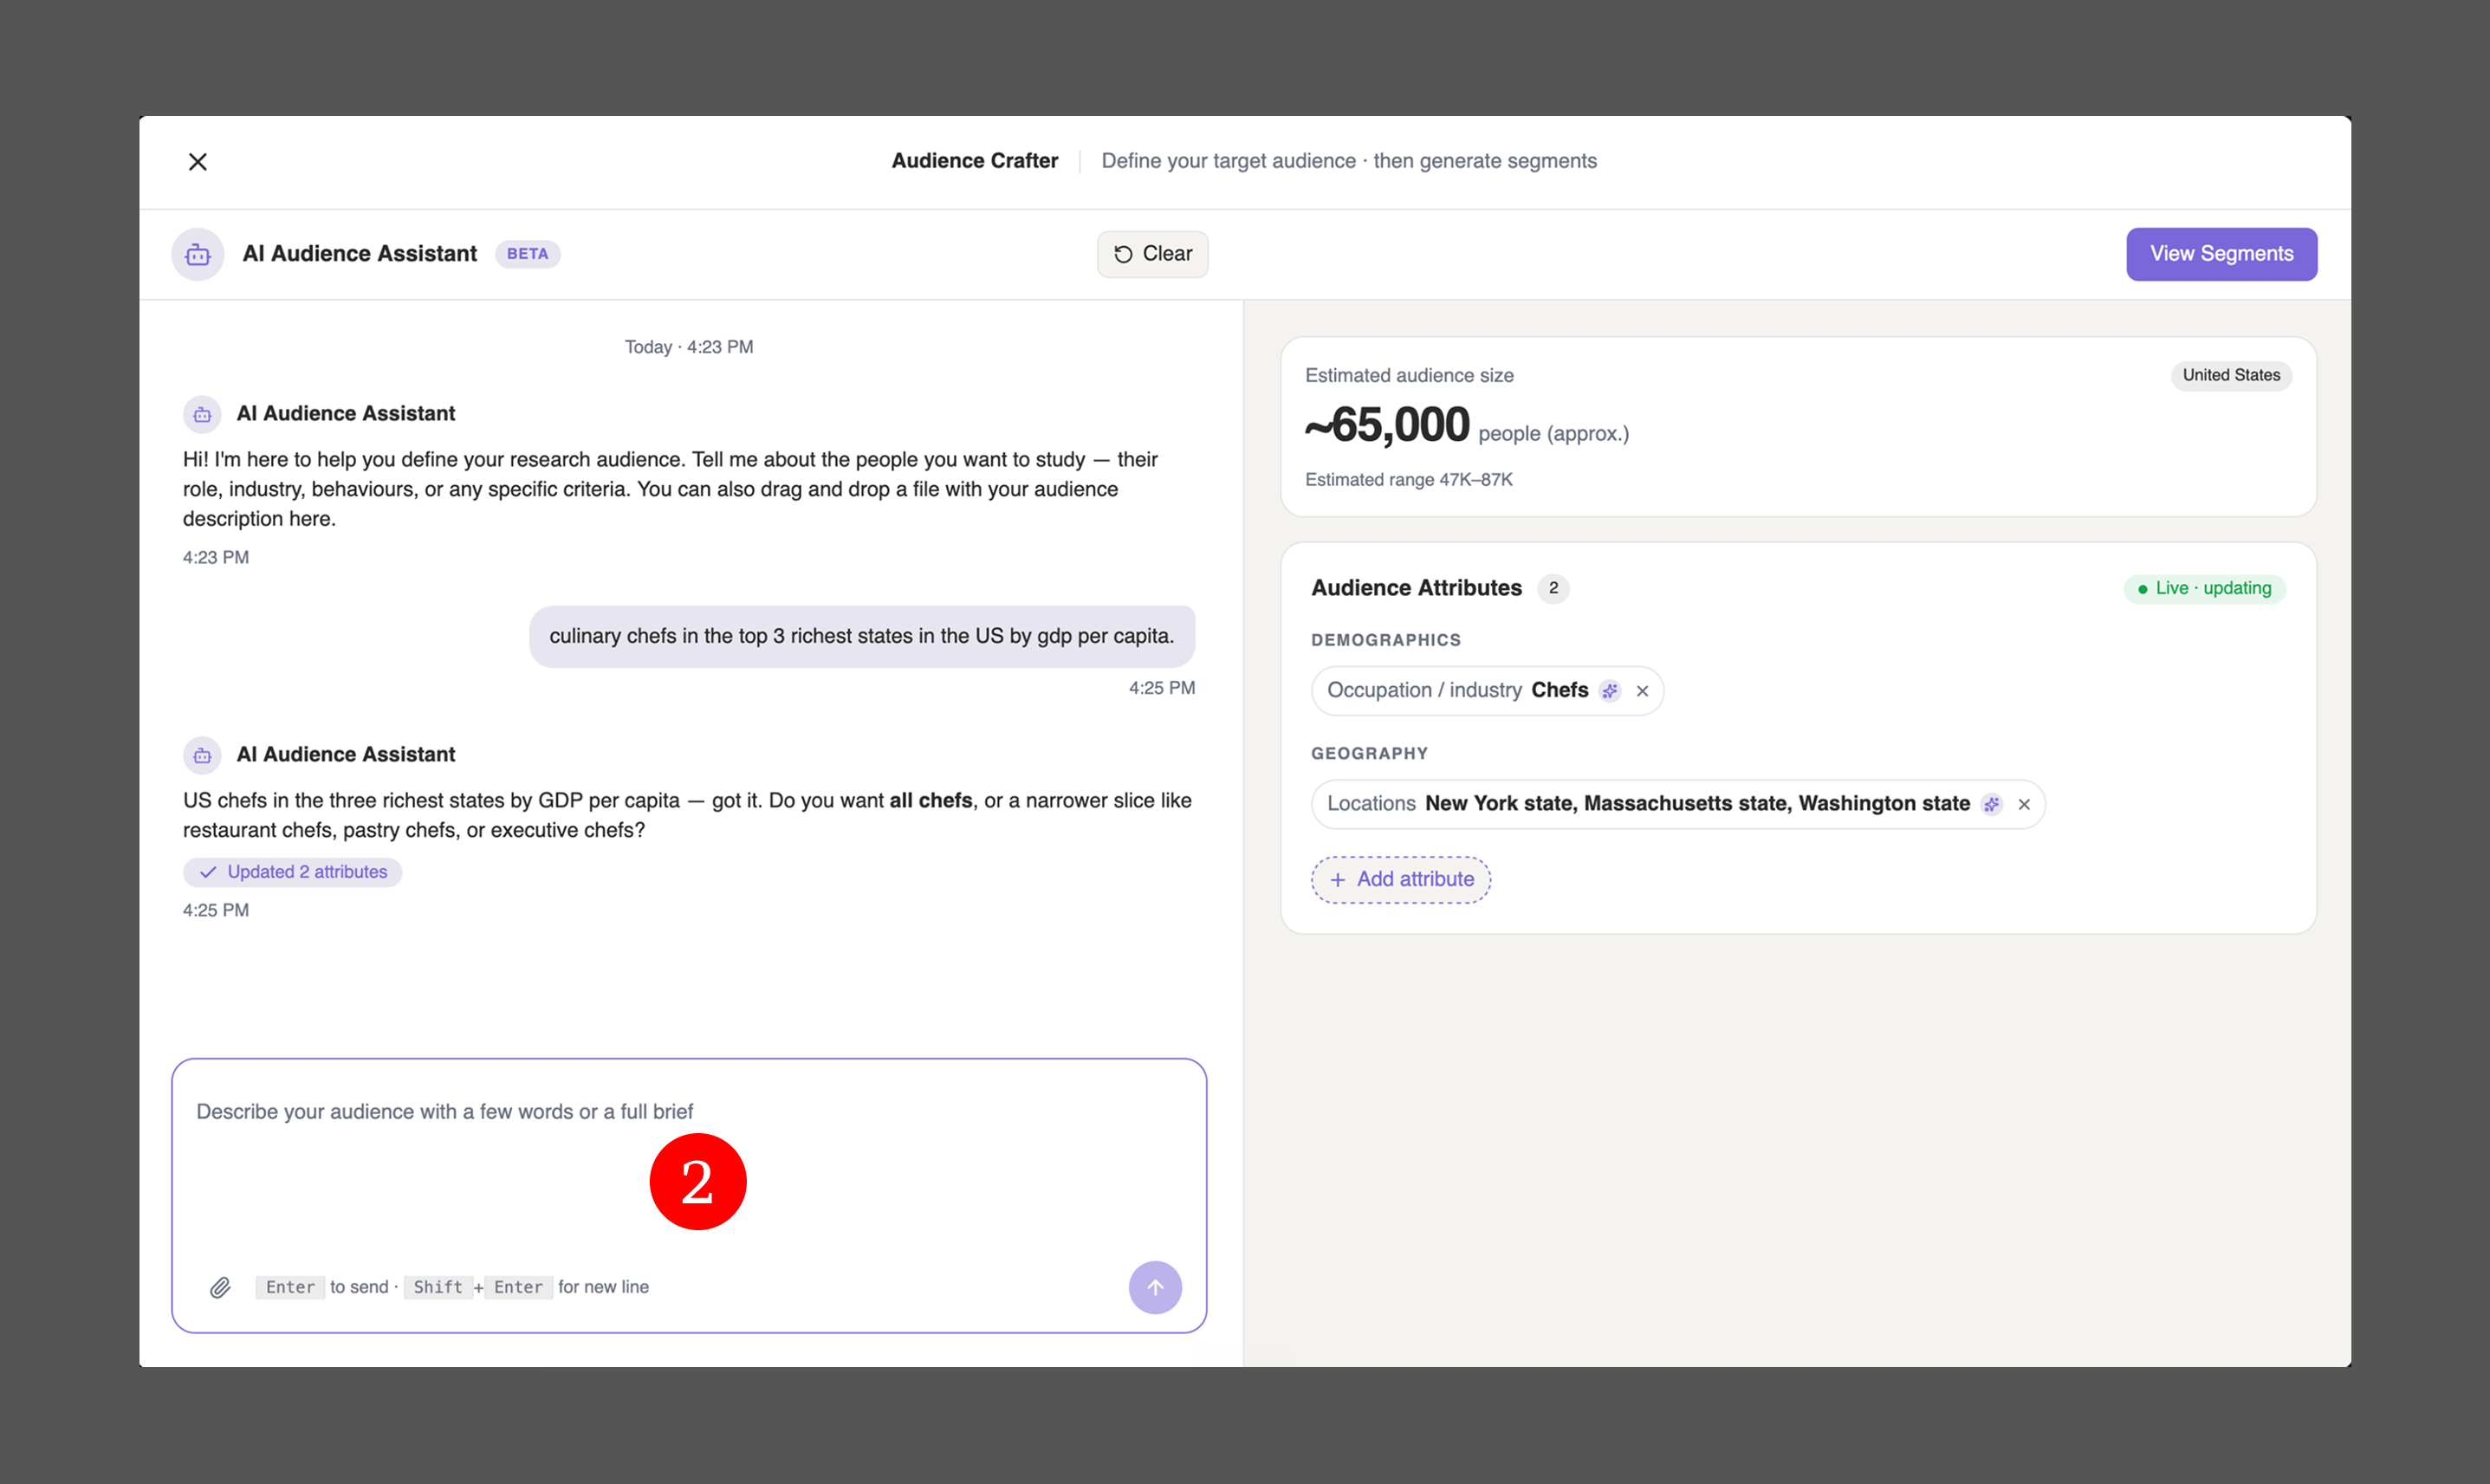
The Audience Crafter is split in two. On the left, the AI Audience Assistant: describe your audience in a few words or a full brief (2). On the right, a live reflection of that conversation — the estimated audience size and your audience attributes, what we also call dynamic parameters.
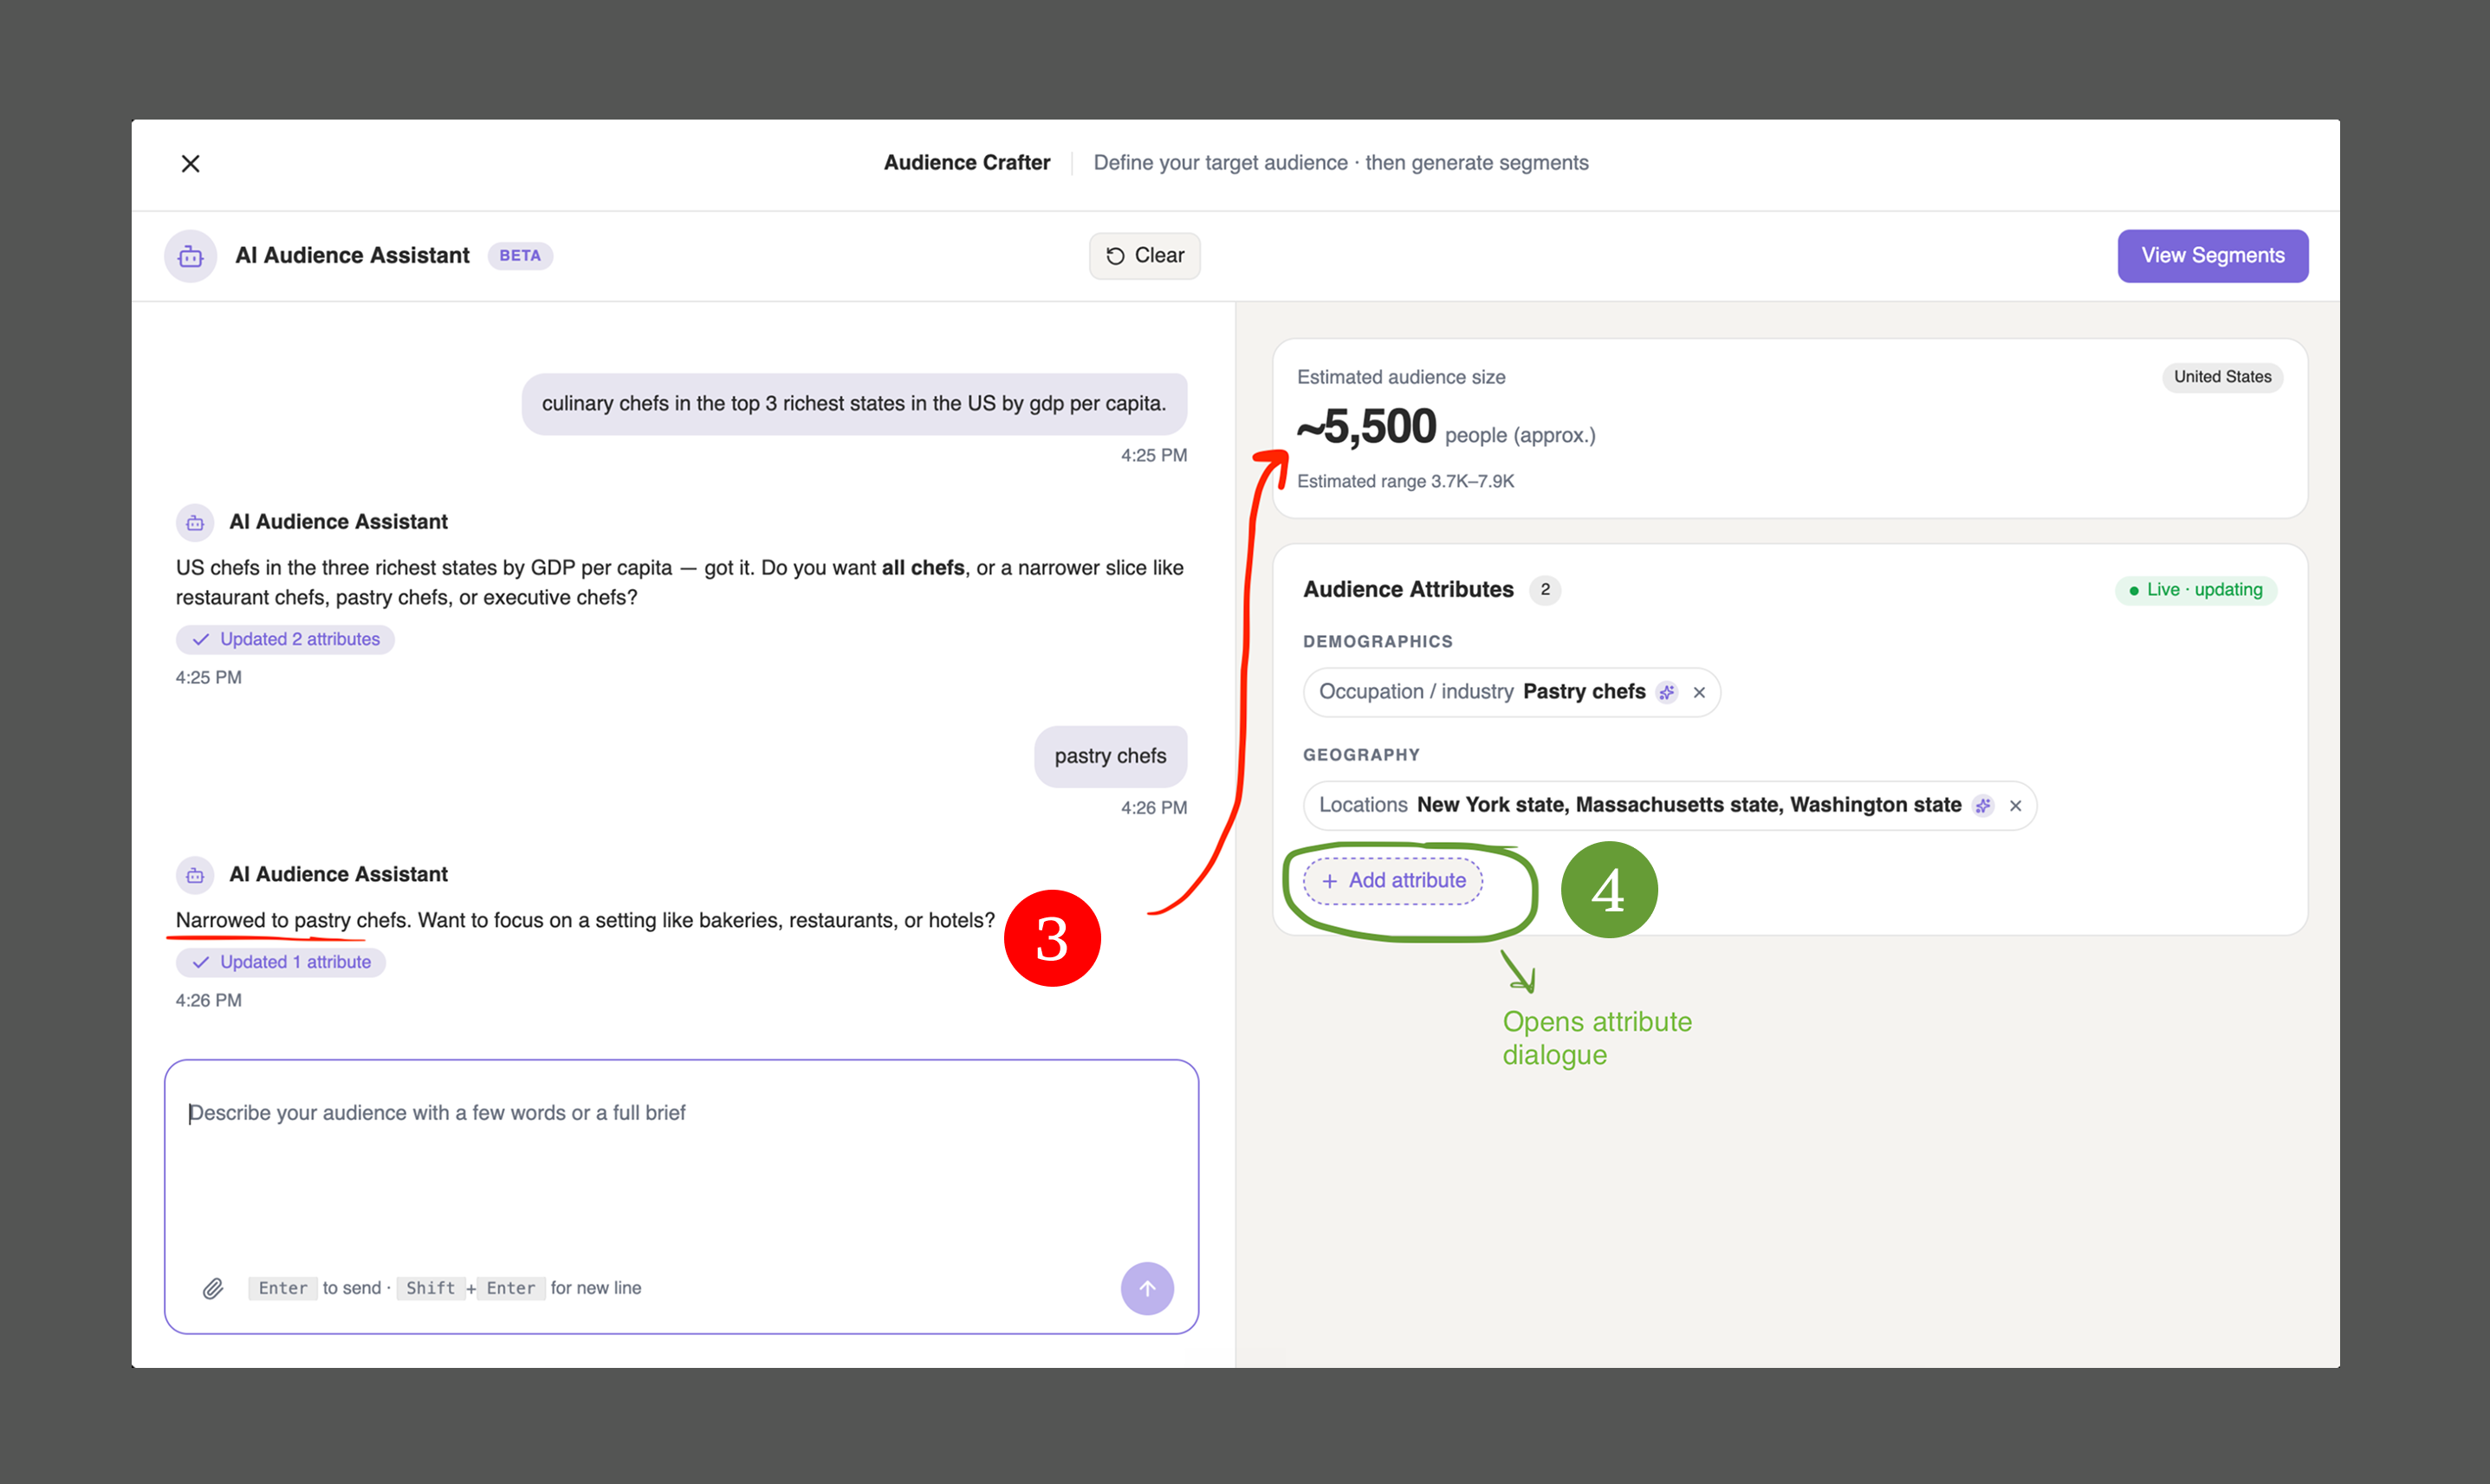
The more specific you get, the smaller the estimated audience becomes (3) — here, narrowing from all chefs to pastry chefs drops the estimate from ~65,000 to ~5,500 people. This mirrors a traditional recruitment agency: the narrower the scope, the fewer participants are available.
3. Fine-tune attributes
For more direct control, click Add attribute (4) to open the Add Attribute dialog.
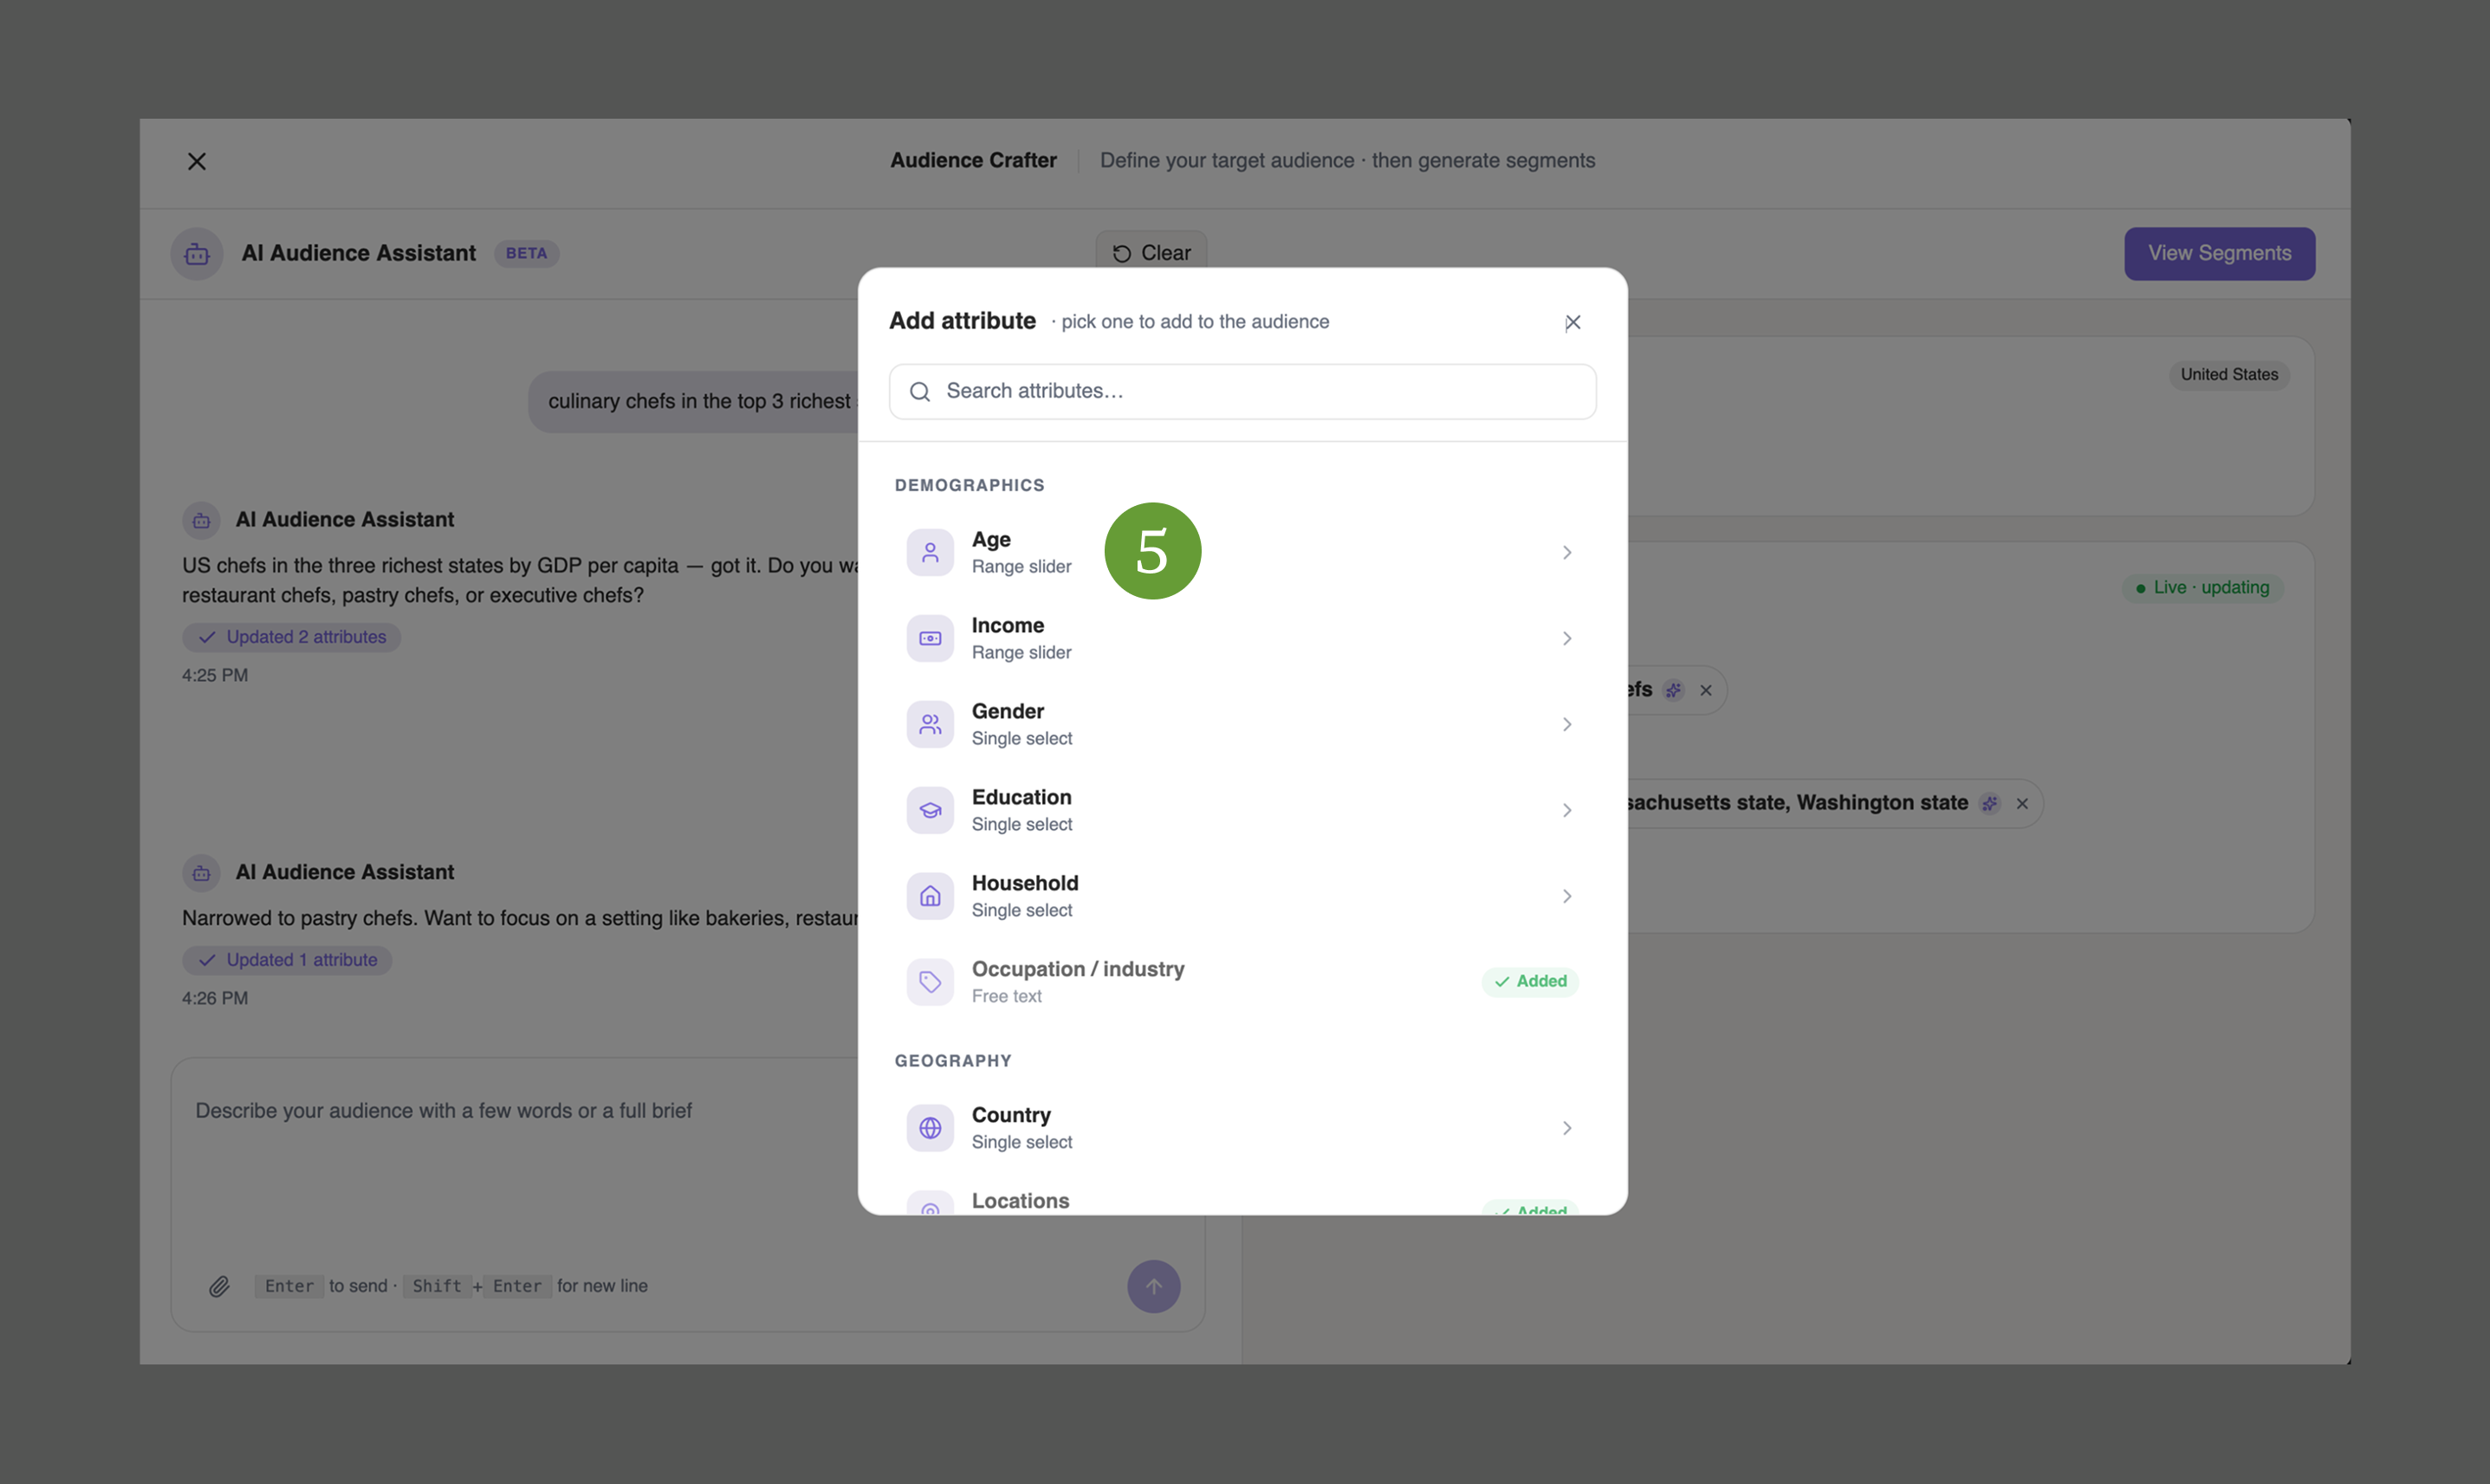
Pick an attribute — for example, Age (5)…
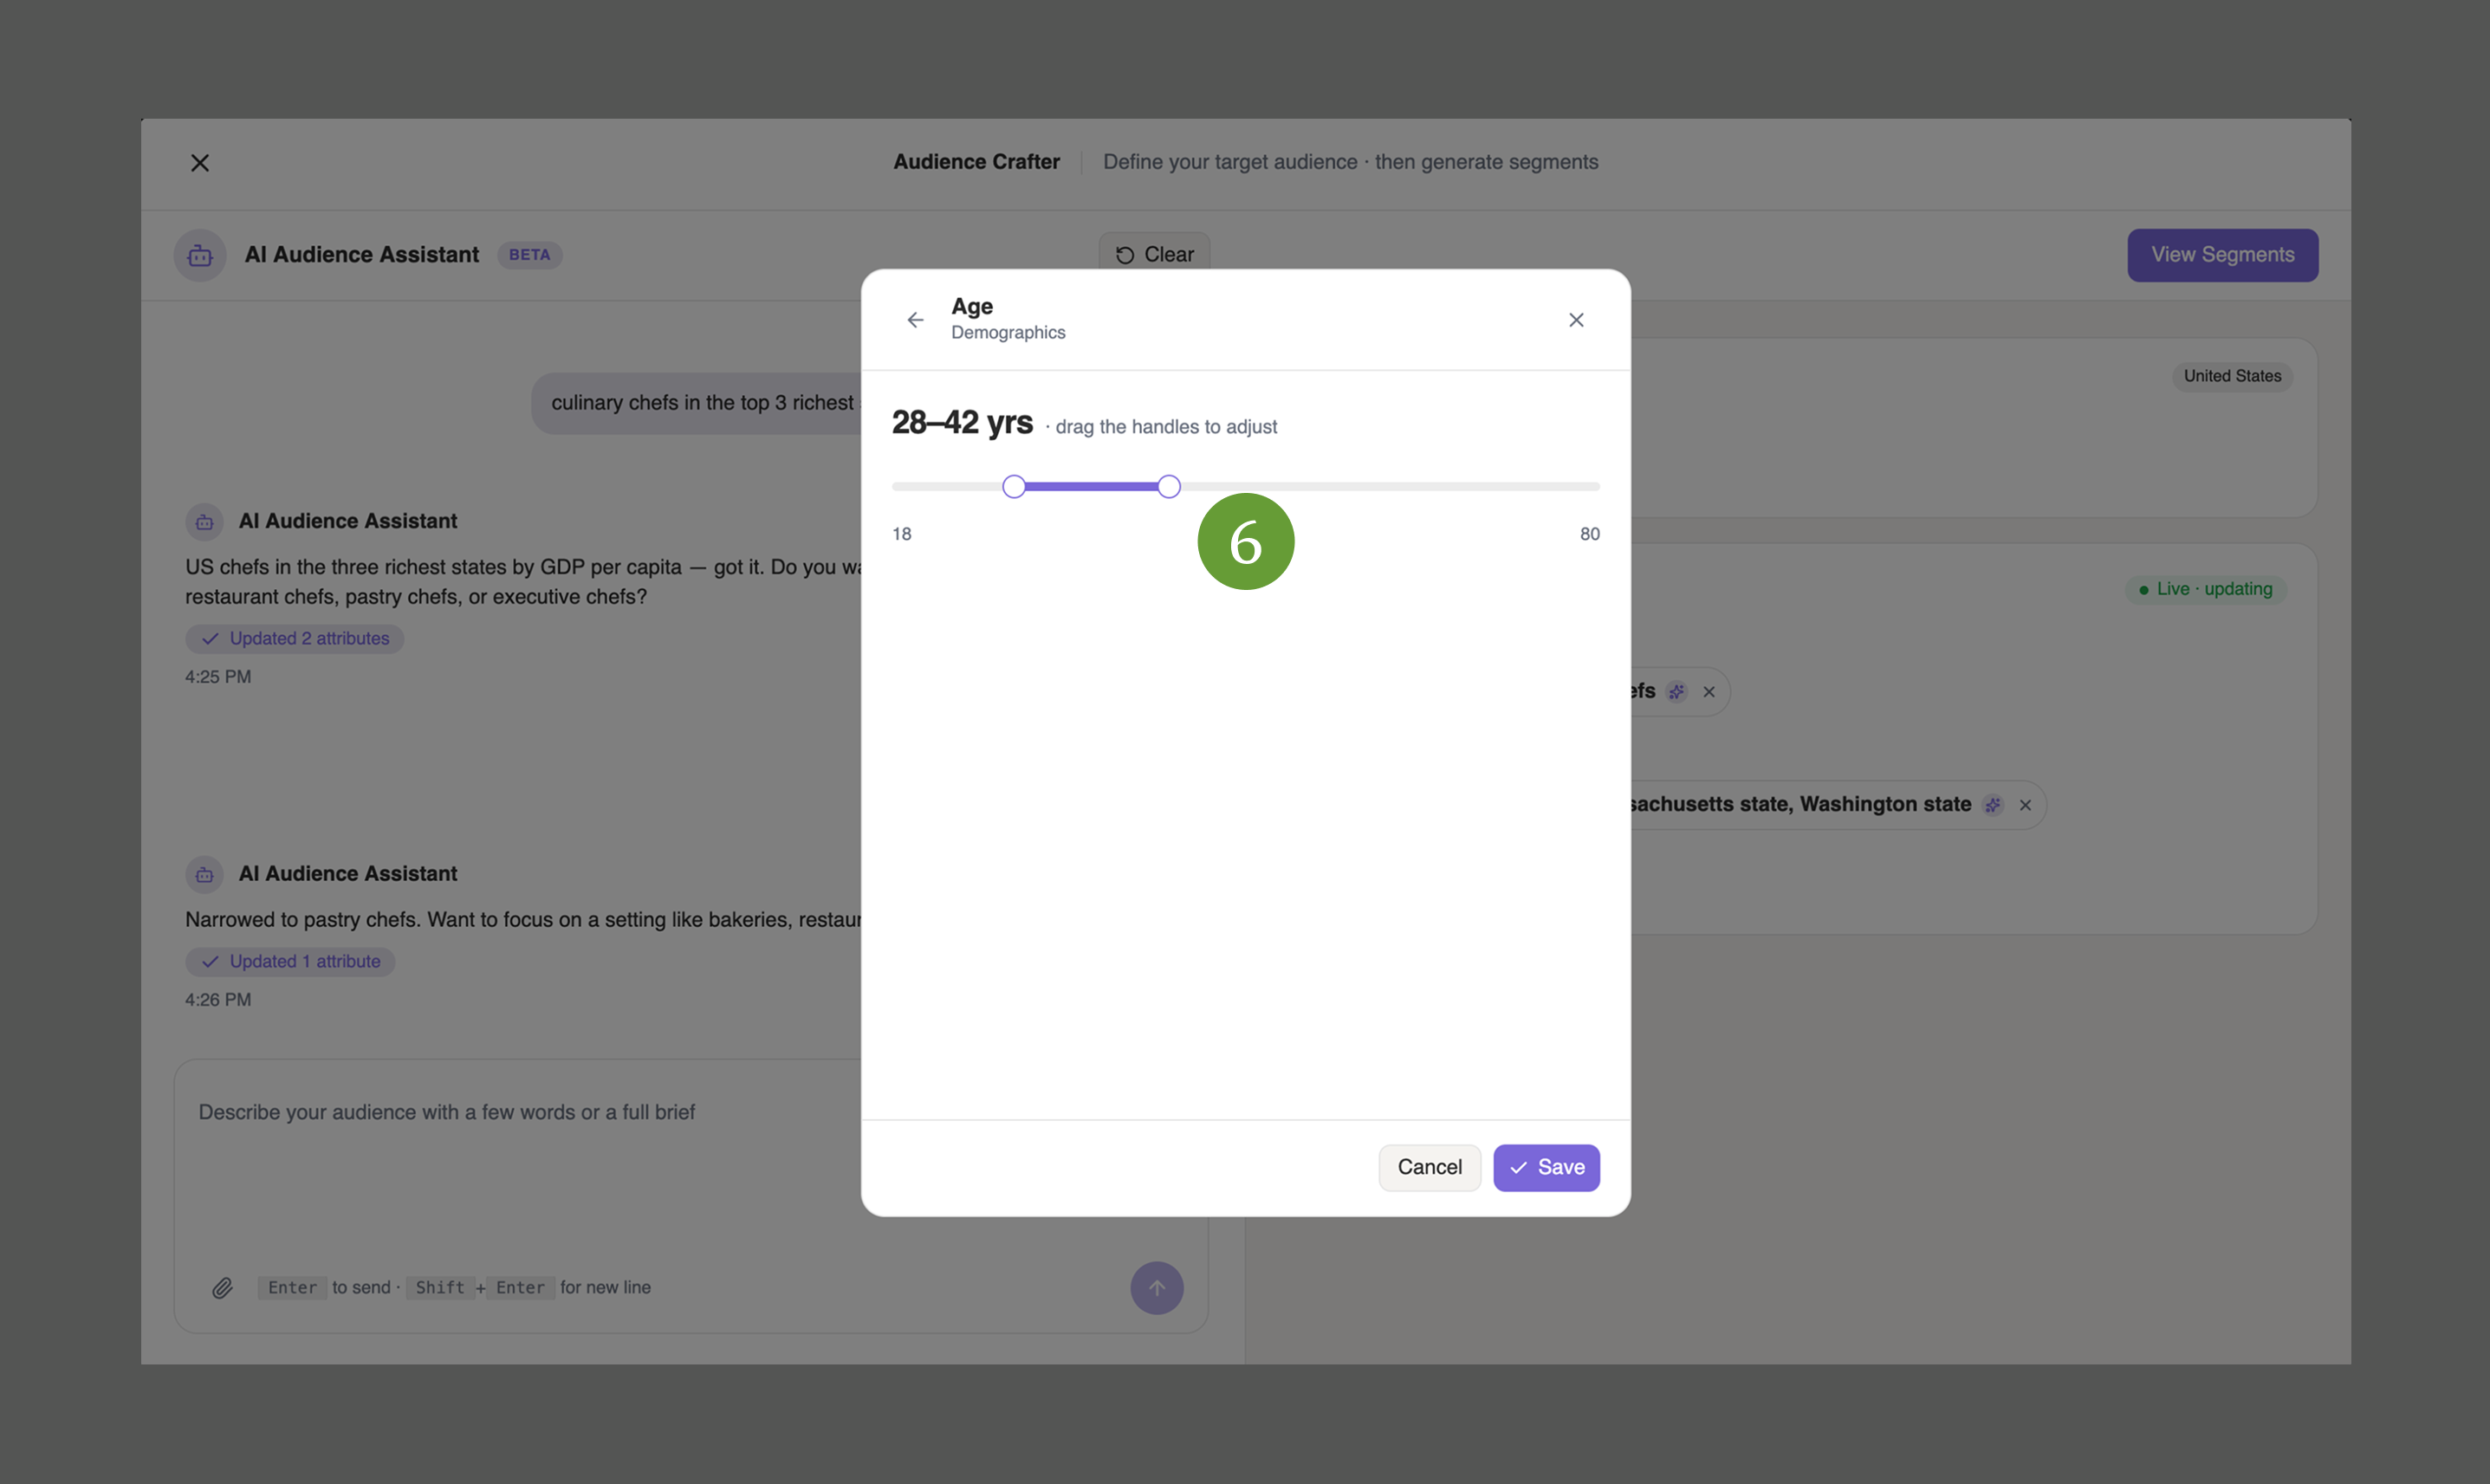
…and set the exact range you want with the slider (6).
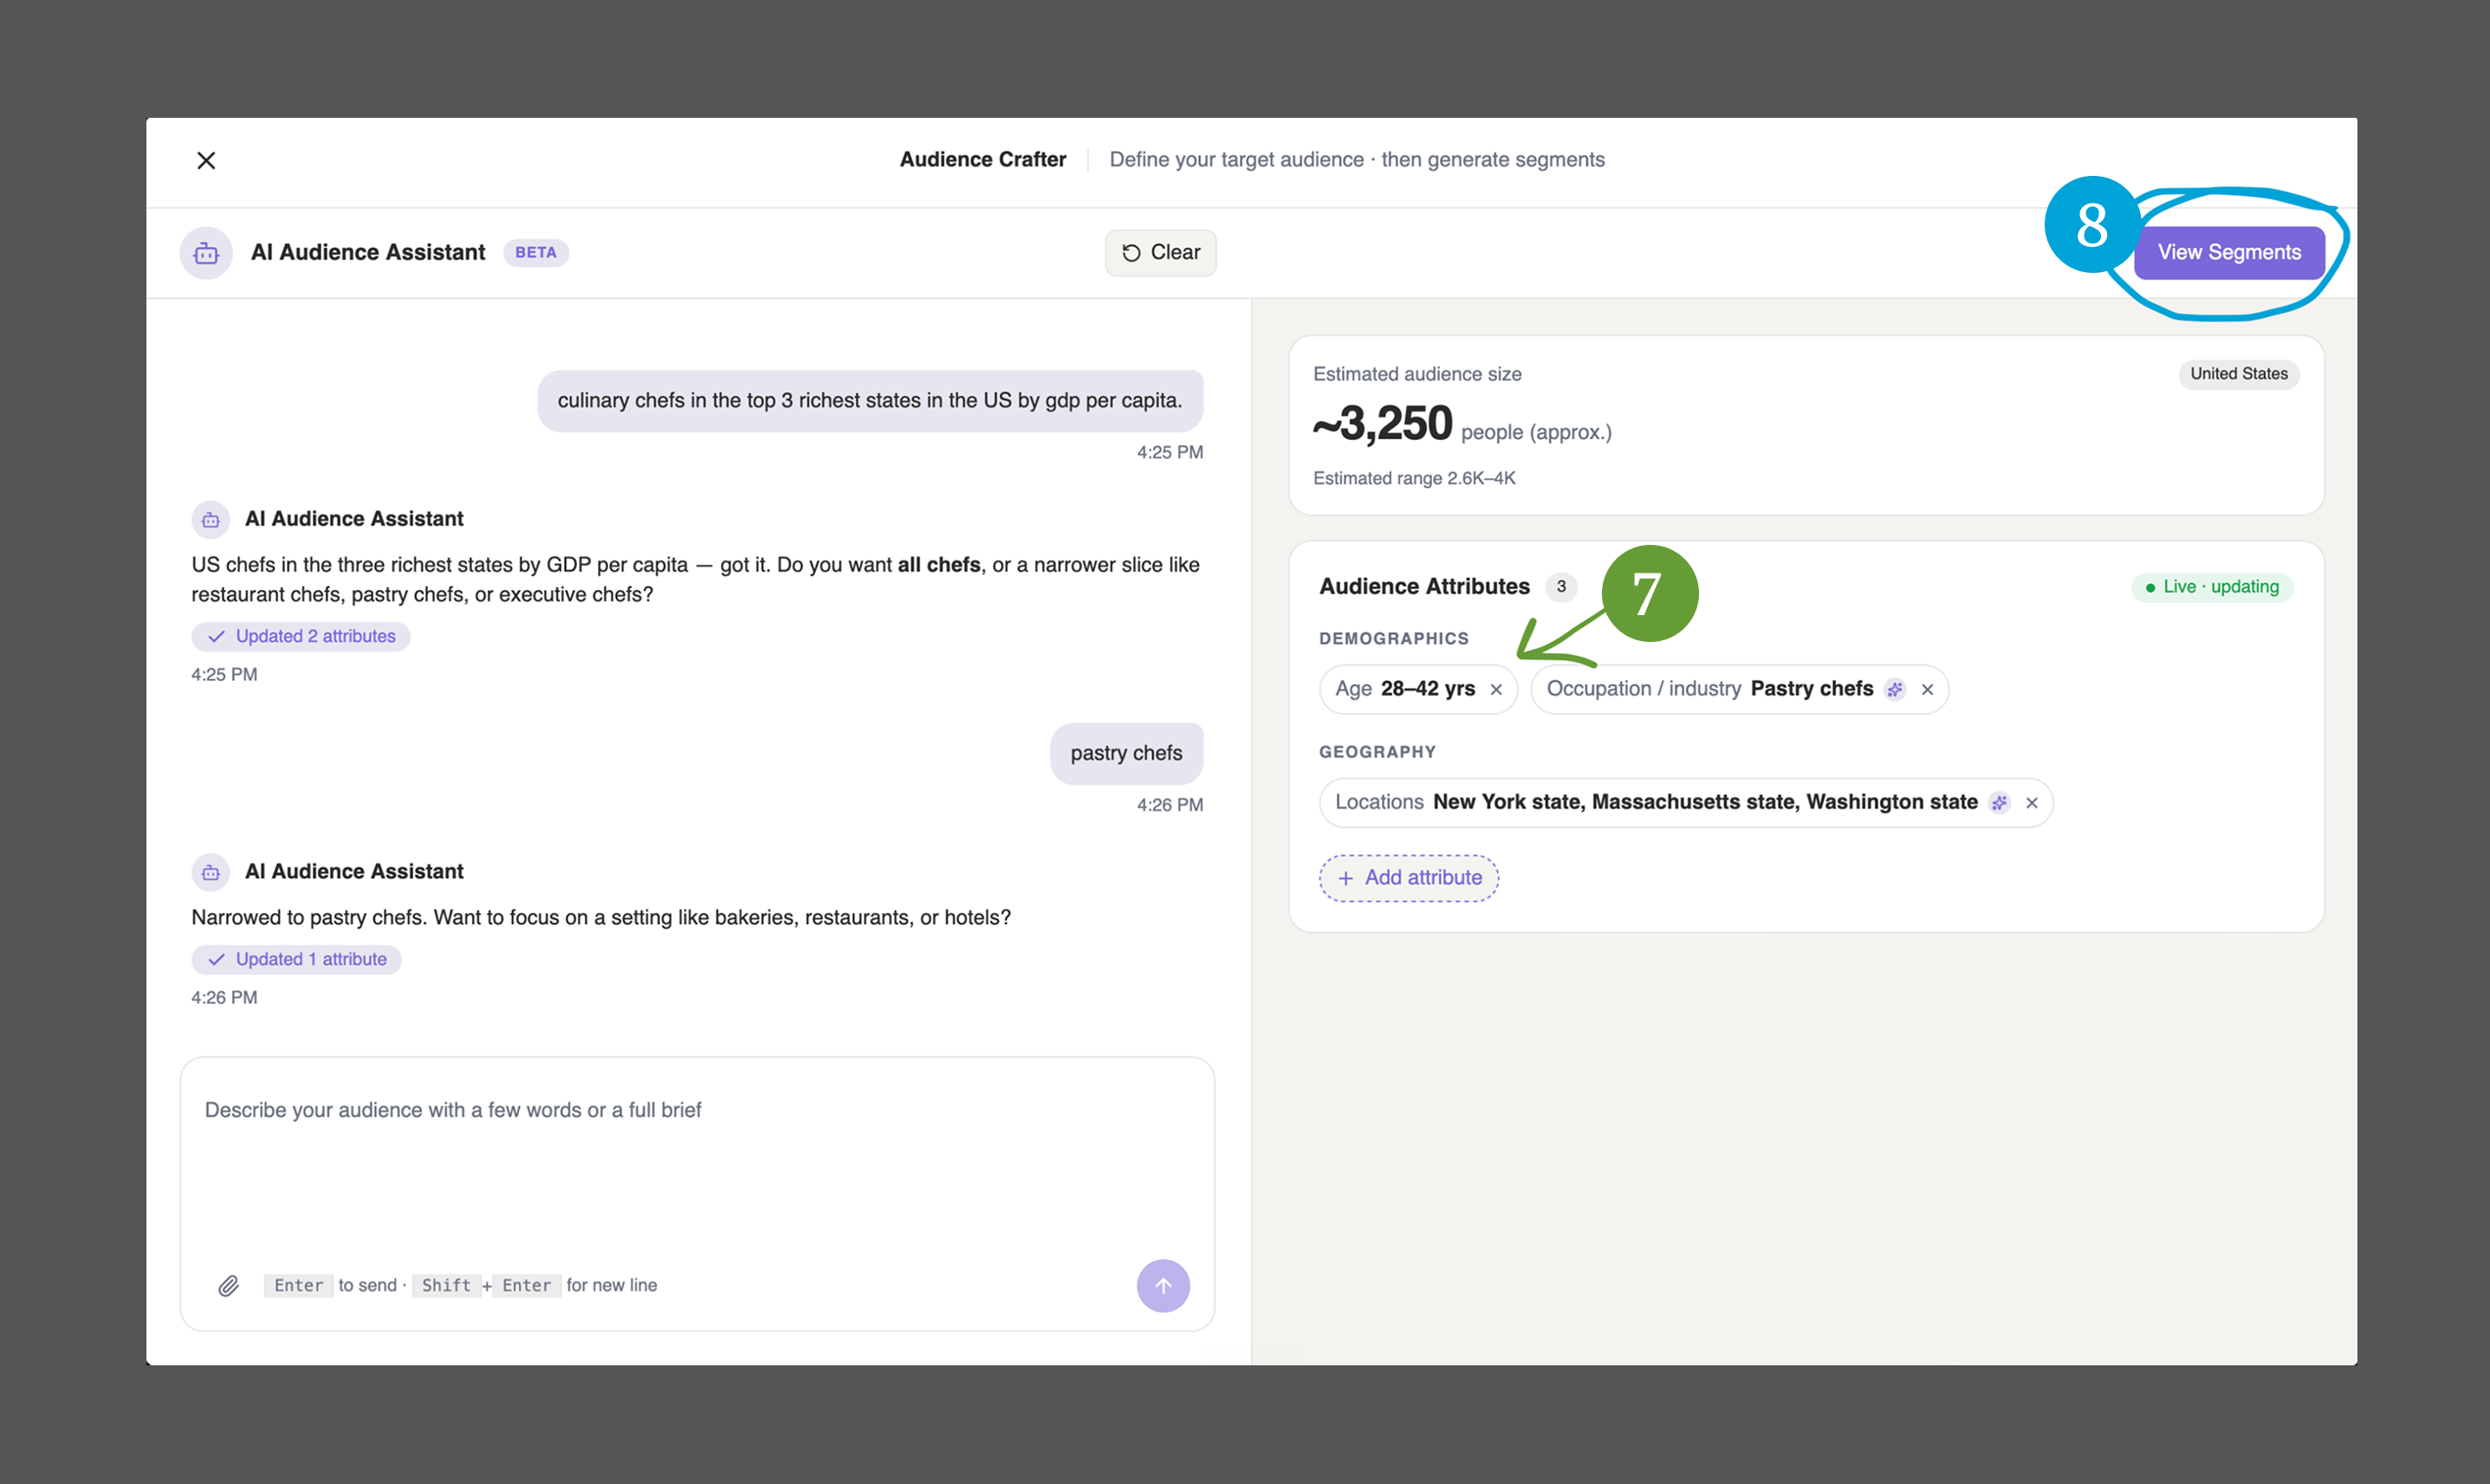
Your changes are reflected immediately in the audience attributes — the age range now matches what you specified (7).
4. Segment your audience
Click View Segments in the top right (8) to move to the segmentation screen.
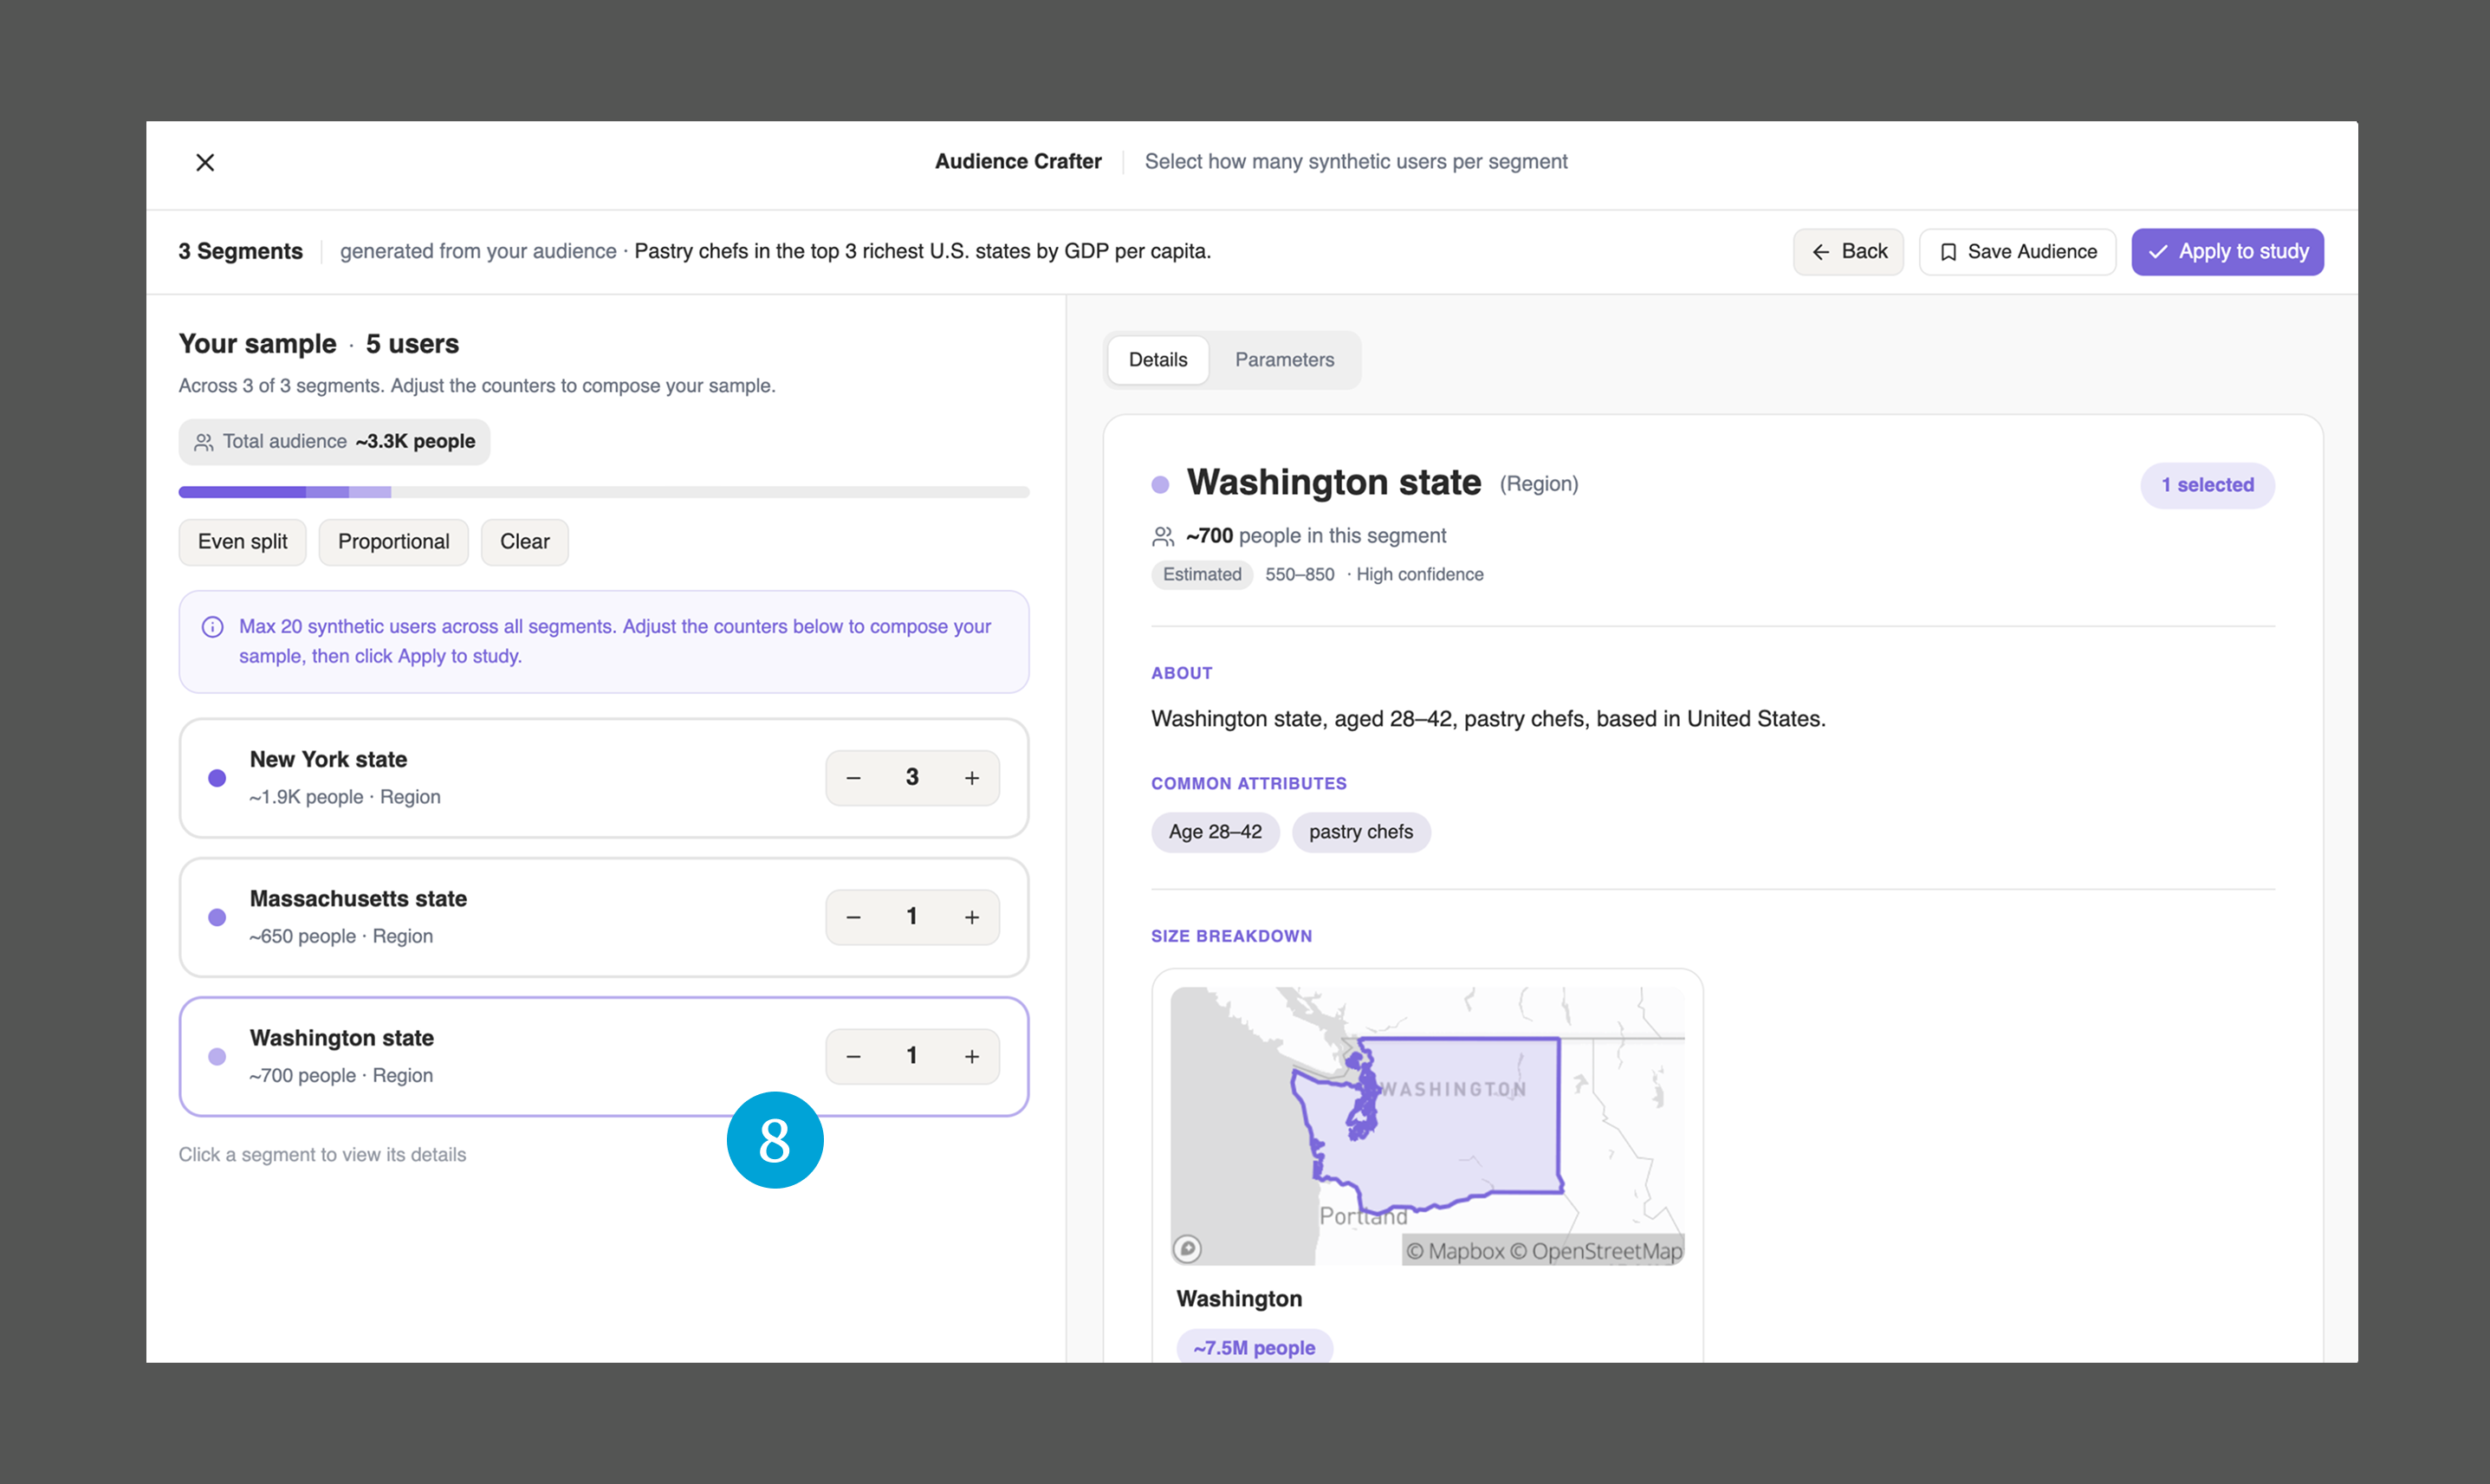
Synthetic Users analyzes the audience you've defined and generates the most grounded segmentation possible (8.1). Use the counters to choose how many synthetic users to interview from each segment, and click any segment to view its details.
5. Review parameters, save, and reuse
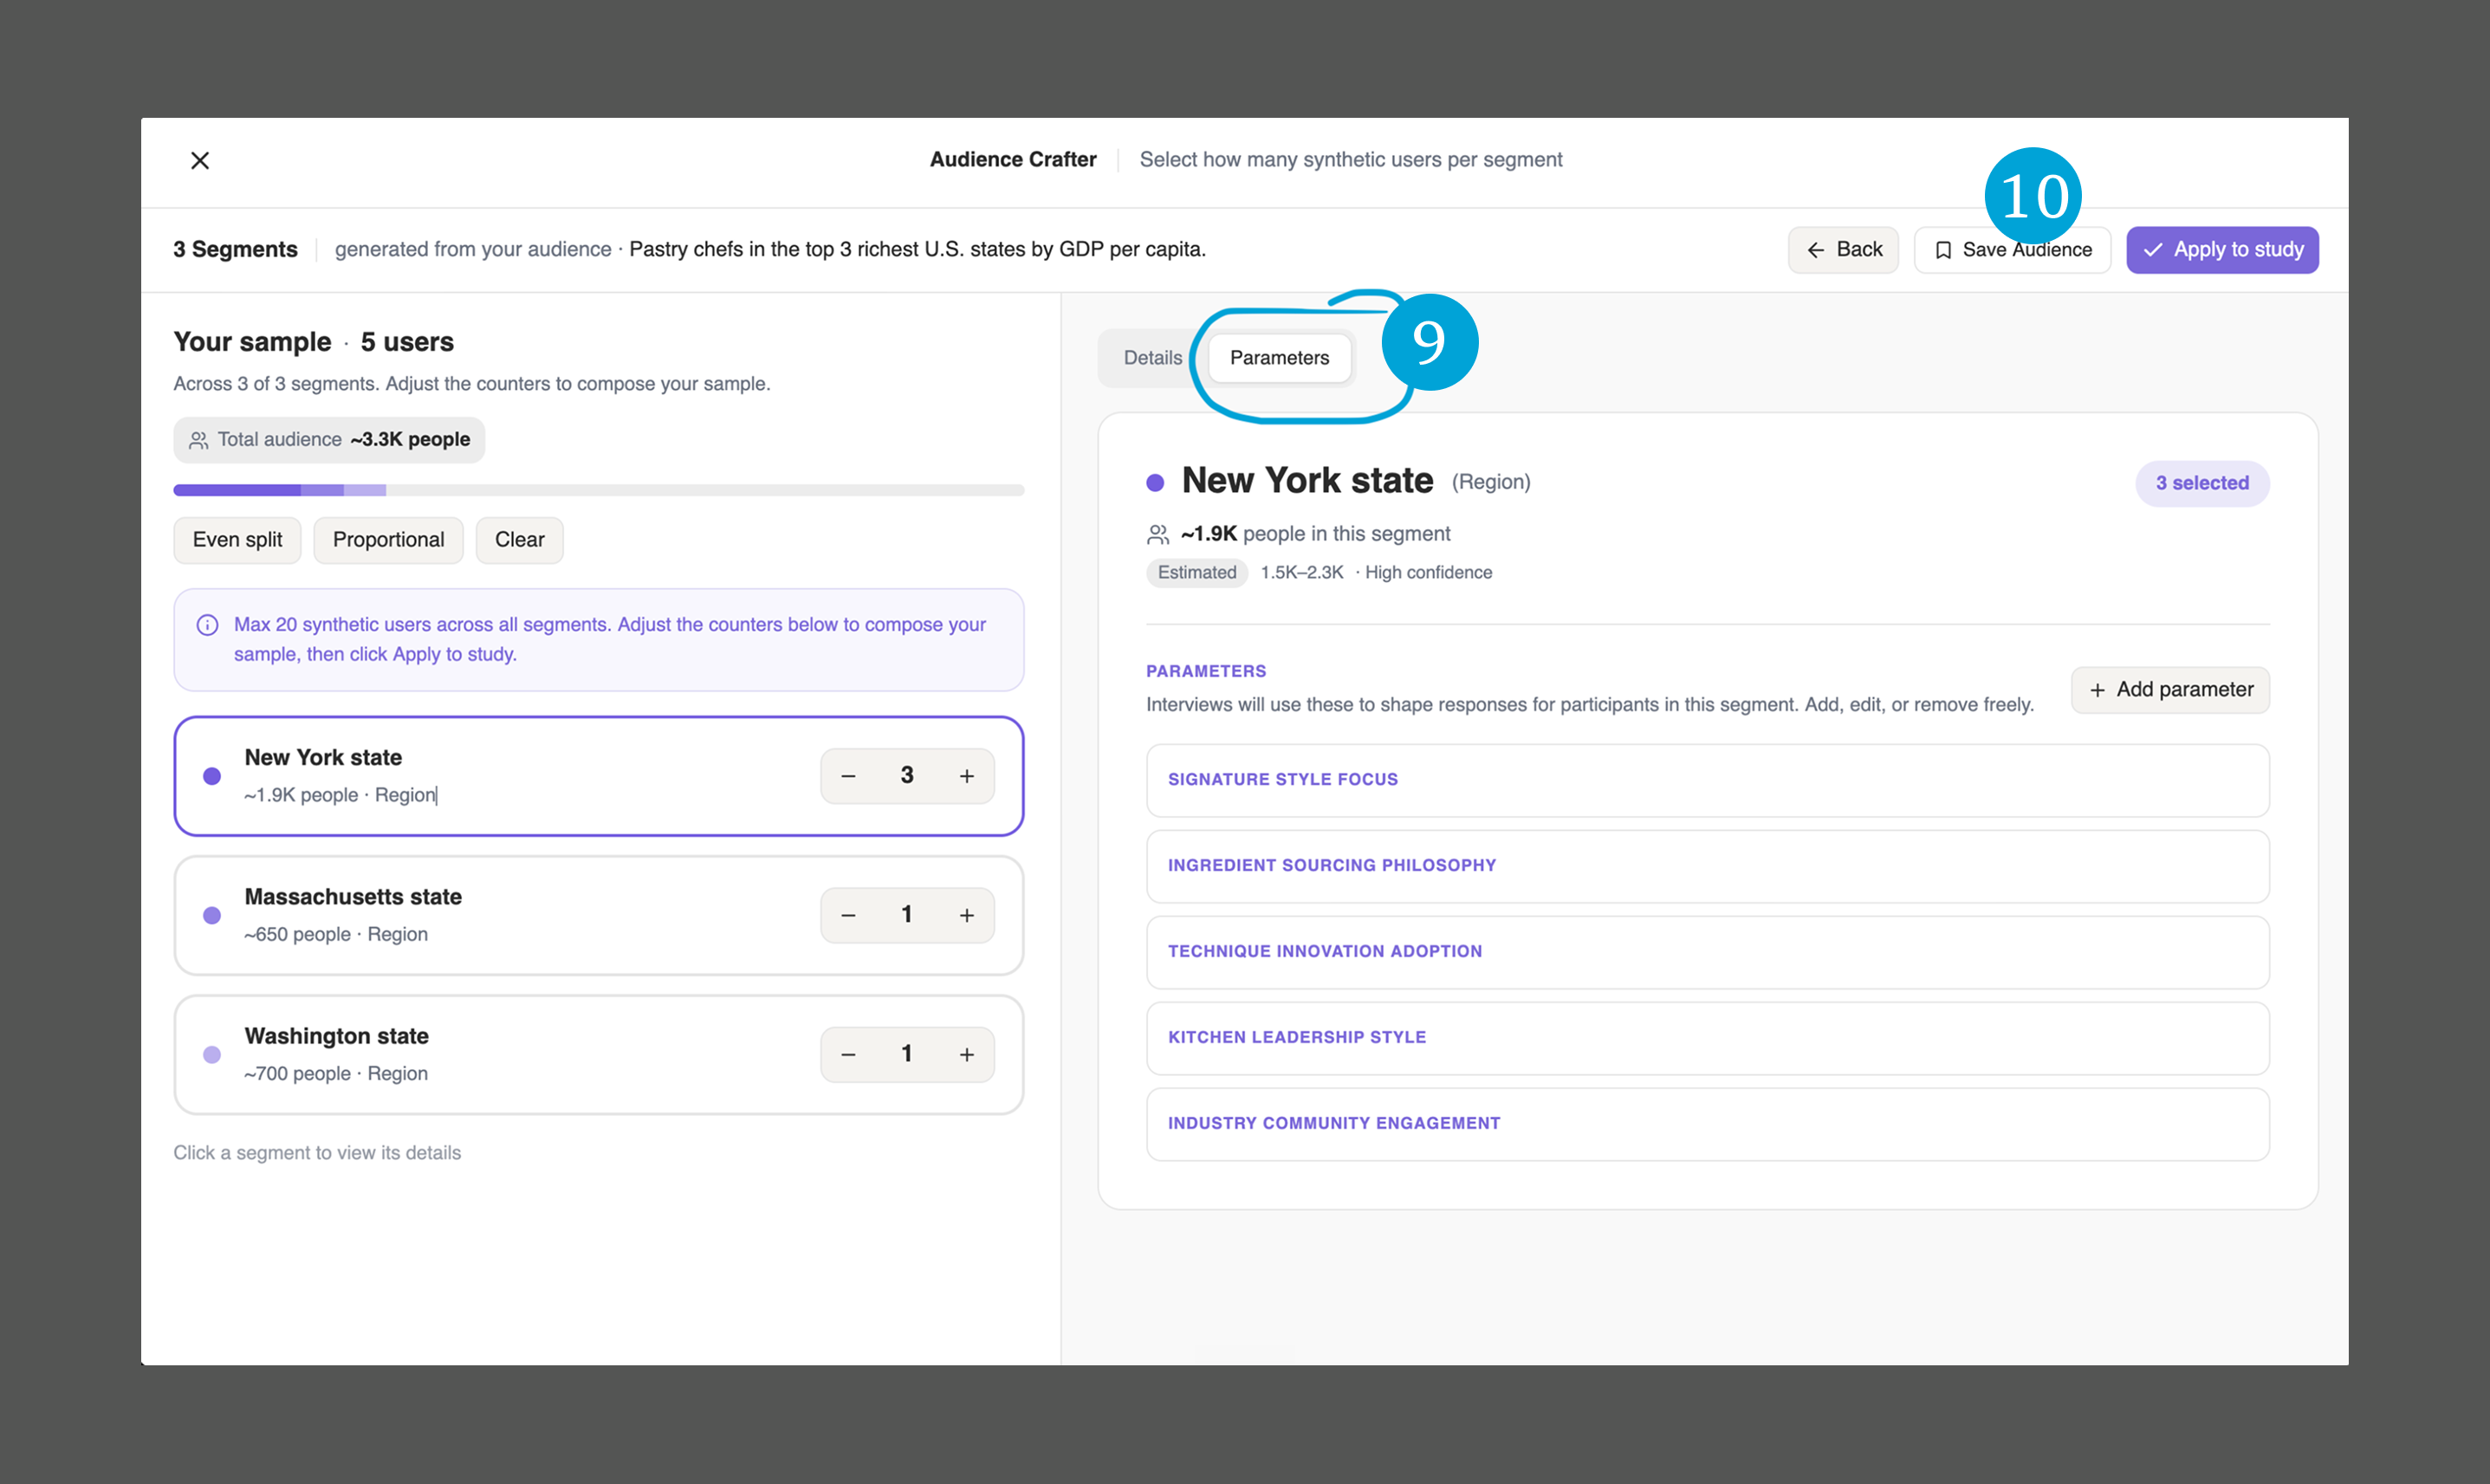
The Parameters tab (9) shows every parameter shaping the responses of participants in that segment. You can add, edit, or remove them freely. To reuse this audience later, click Save Audience (10)…
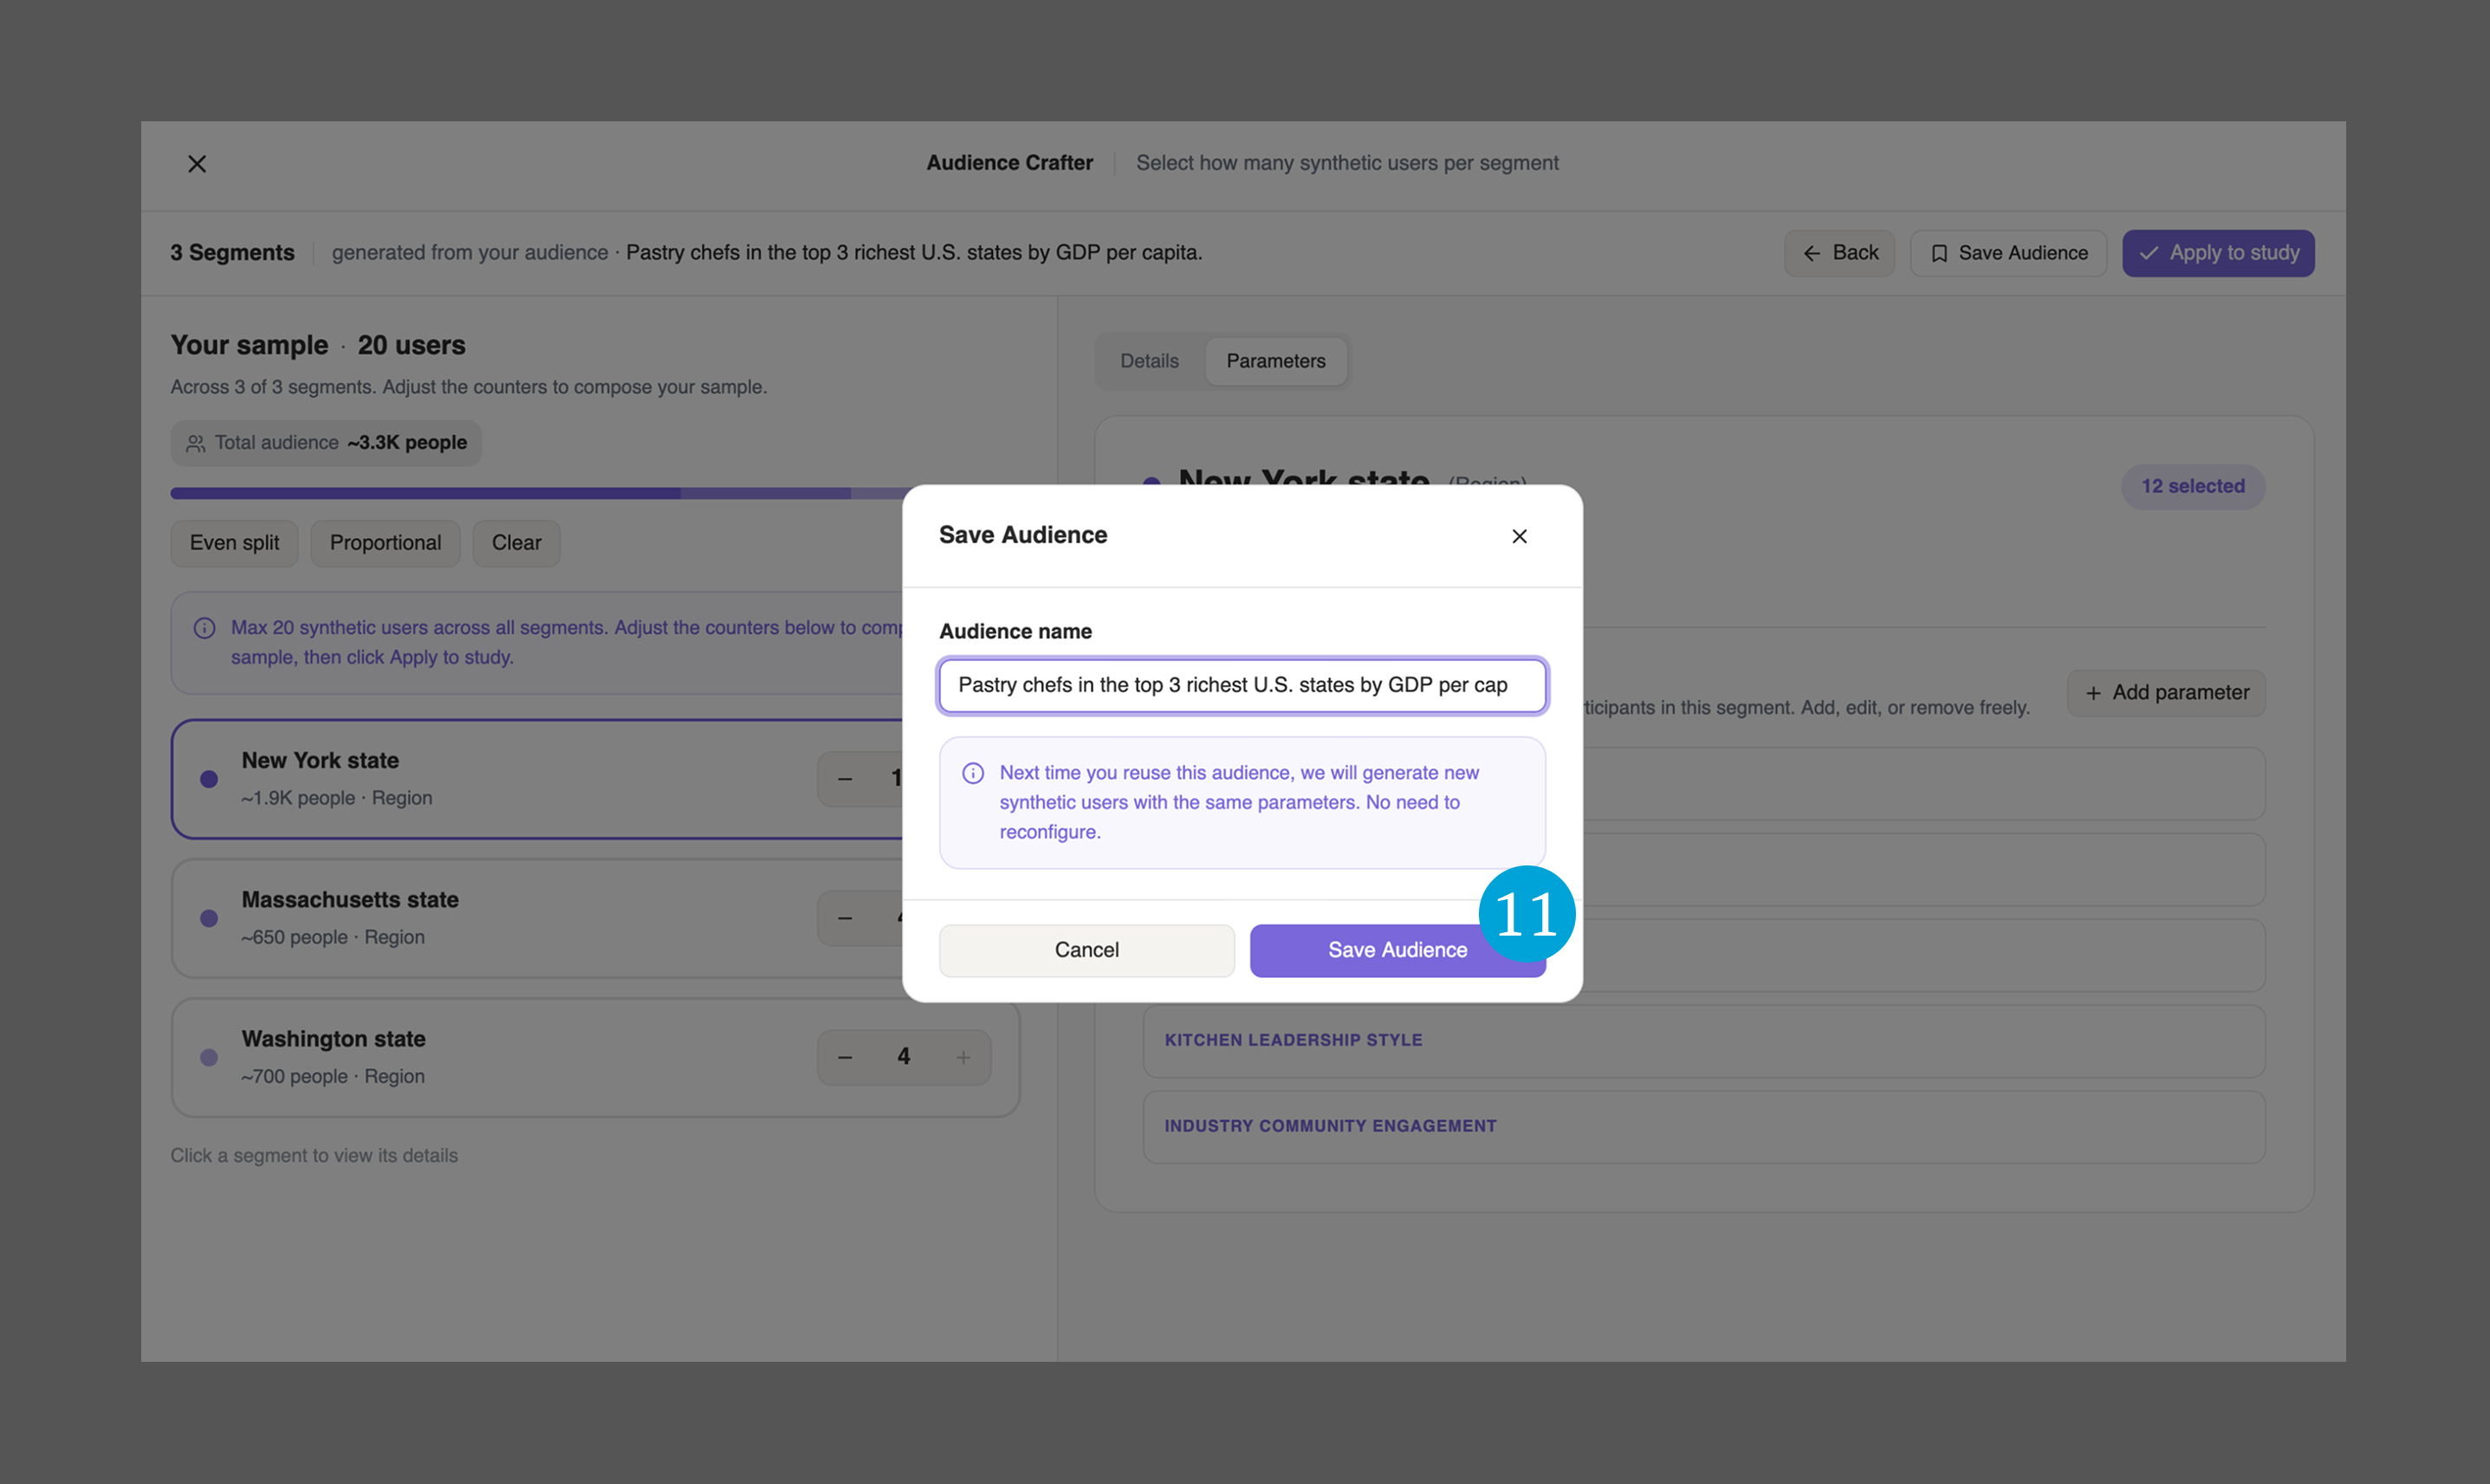
…give it a name, and confirm (11). Next time you reuse it, we'll generate new synthetic users with the same parameters — no need to reconfigure.
6. Run your interviews
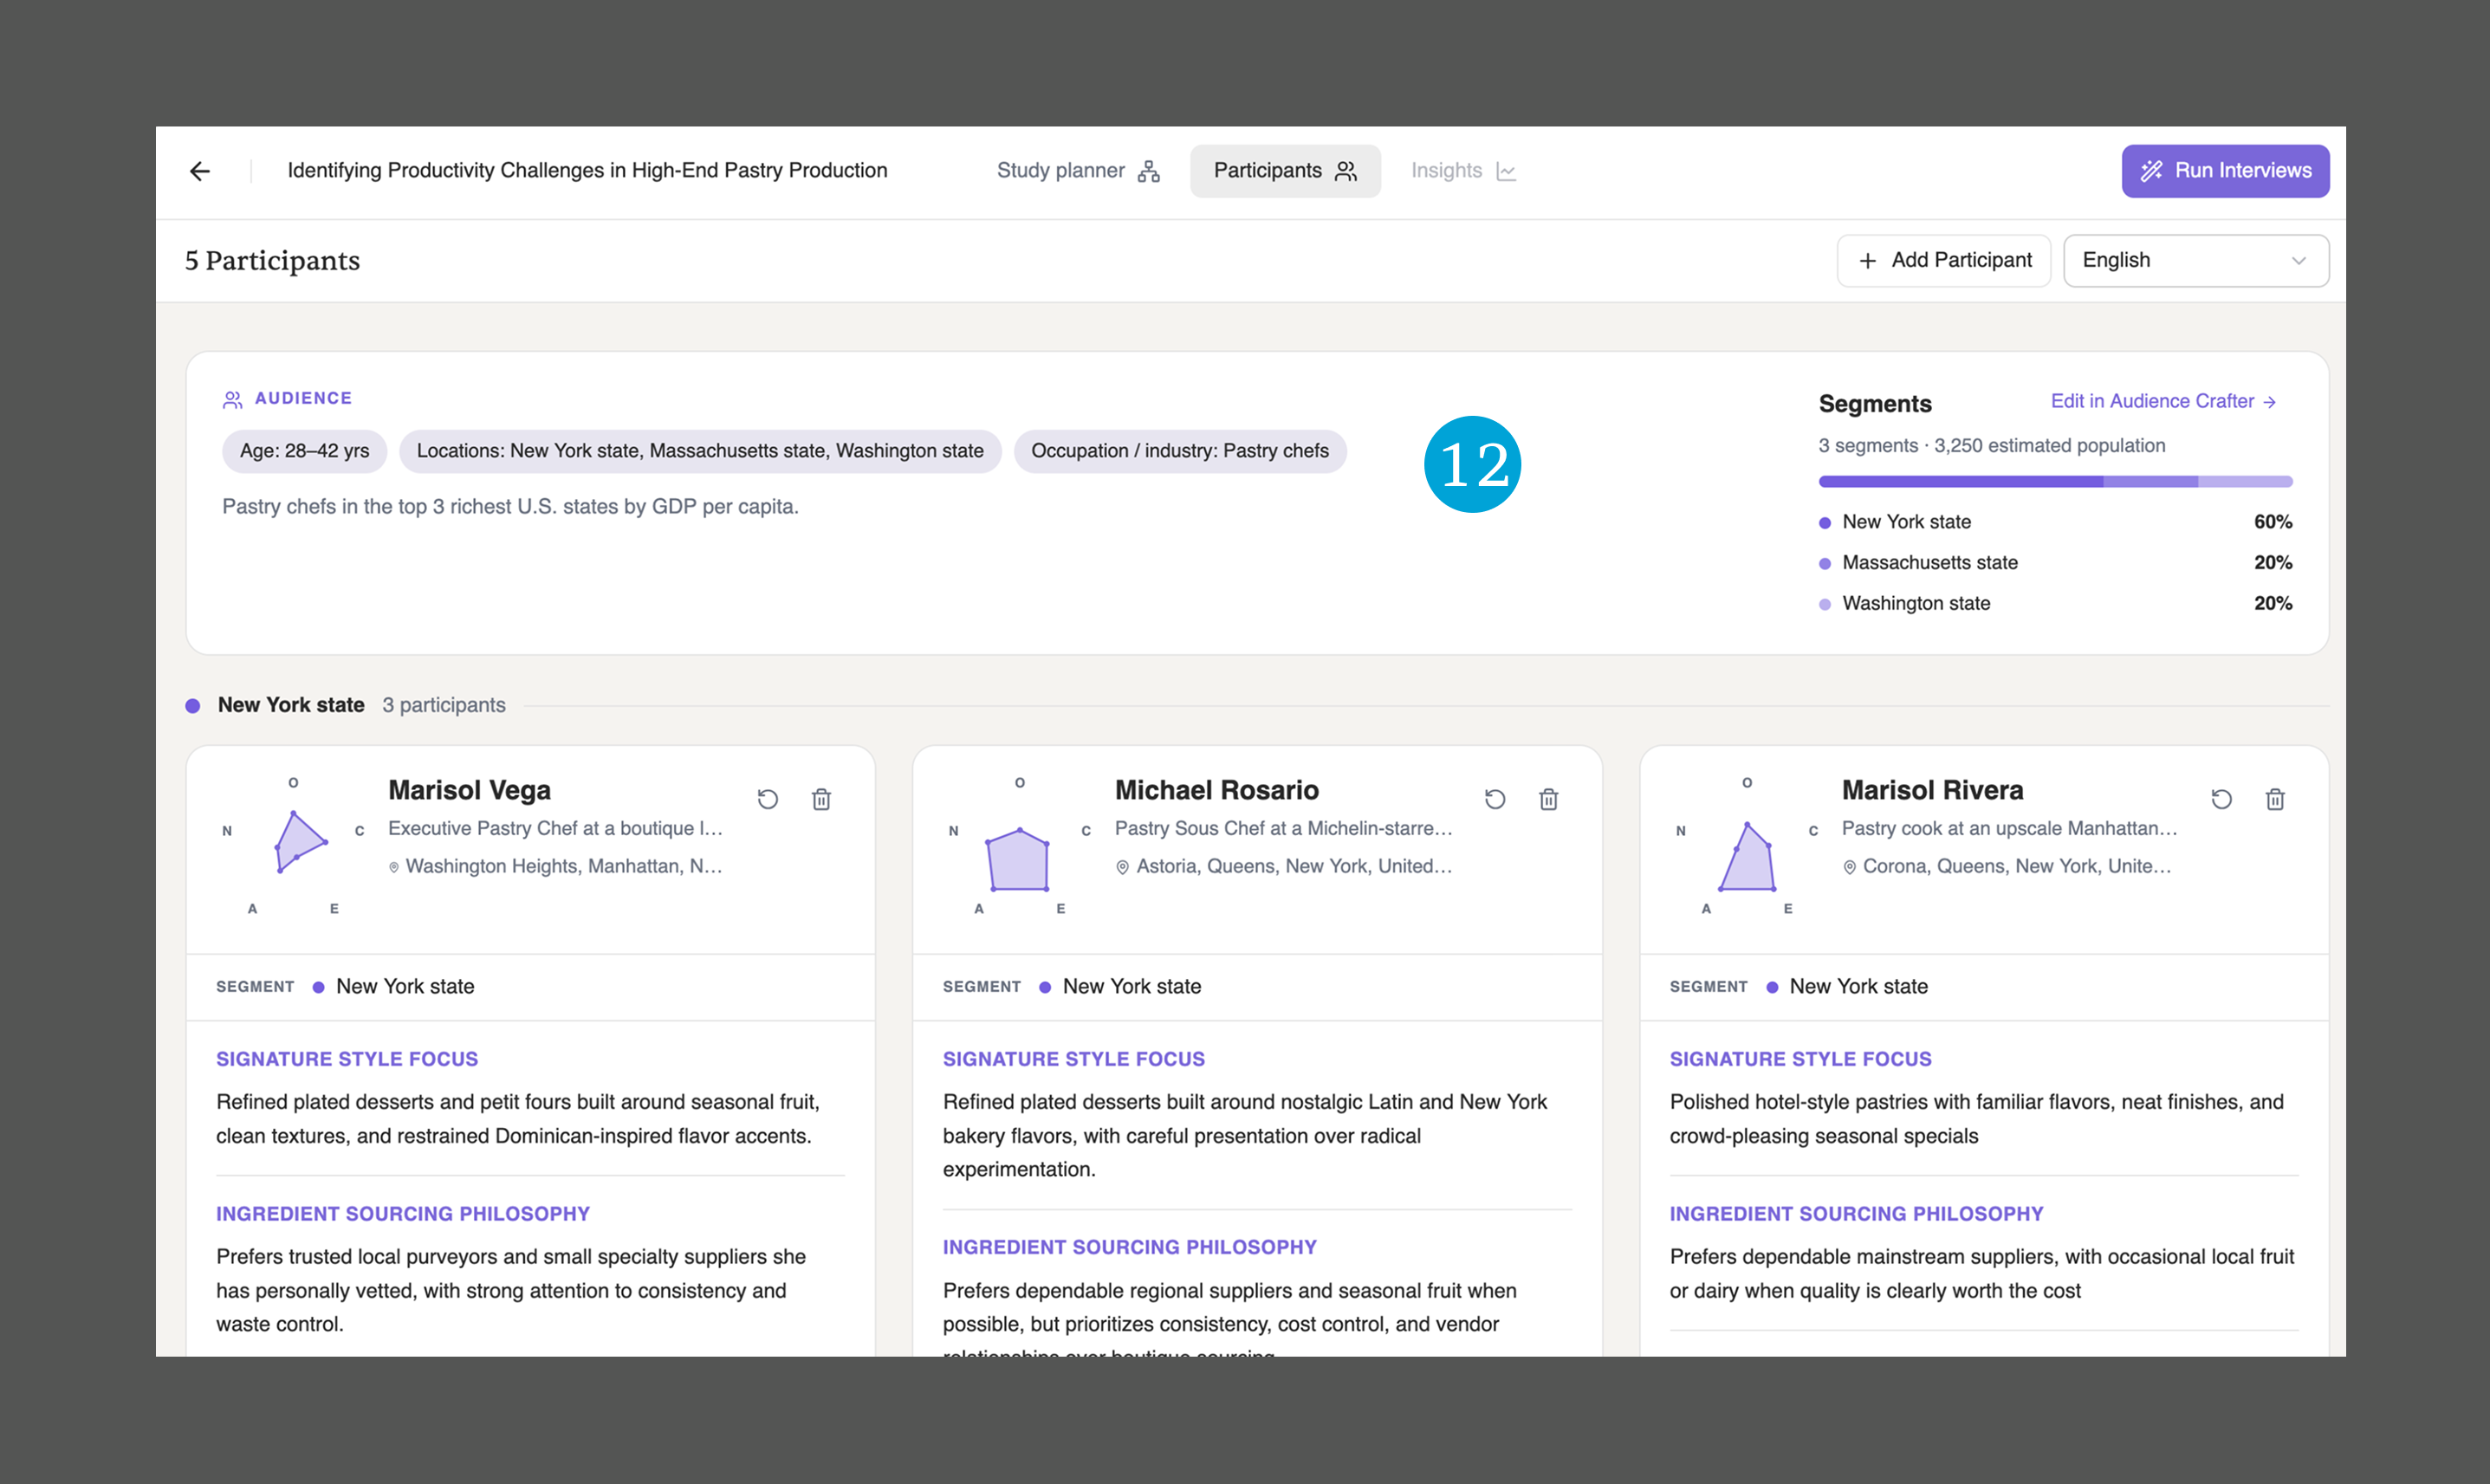
Once you apply the audience to your study, it's synthesized into participants. Every Synthetic User is injected with its own personality profile — its own reptilian brain. At the top, you'll see a summary of your audience and segmentation data (12). When you're ready, hit Run Interviews in the top right.
Questions? Book time with our team, or email us at support@syntheticusers.com.